

Avatars
October 4, 2024 · Last updated on May 15, 2026
How to create Photo Avatars in HeyGen to personalize your videos
# Photo Avatars
Turn a simple photo into a personalized AI avatar for effortless, on-brand video creation
Hey, creators! Want to add a personal touch to your videos in just minutes?
Today, let’s generate a custom Photo Avatar in HeyGen to help make your content stand out.
Did you know learners retain up to 80% more information from videos compared to text? Dive into HeyGen Academy: 101 , our self-paced course that covers all the HeyGen essentials.
What’s covered in this guide
In this guide, we’ll cover:
- What are Photo Avatars?
- Create a Photo Avatar
- Customize your Photo Avatar
- Save and use your Photo Avatar
- Generate additional Looks
- Generate Motion
What are photo avatars
Photo Avatars are AI-generated virtual characters created from a single photo or image. They turn a still image into a lifelike digital presenter that can speak, move, and deliver your message on video.
Using your uploaded photo, HeyGen creates a realistic animated avatar that replaces the need for cameras, lighting, or filming. You can make one from your own photo, choose from the public library, or generate a new character with AI.
Once created, your Photo Avatar can be reused across unlimited videos, making it easy to scale content, stay consistent on camera, and save time.
Create a photo avatar
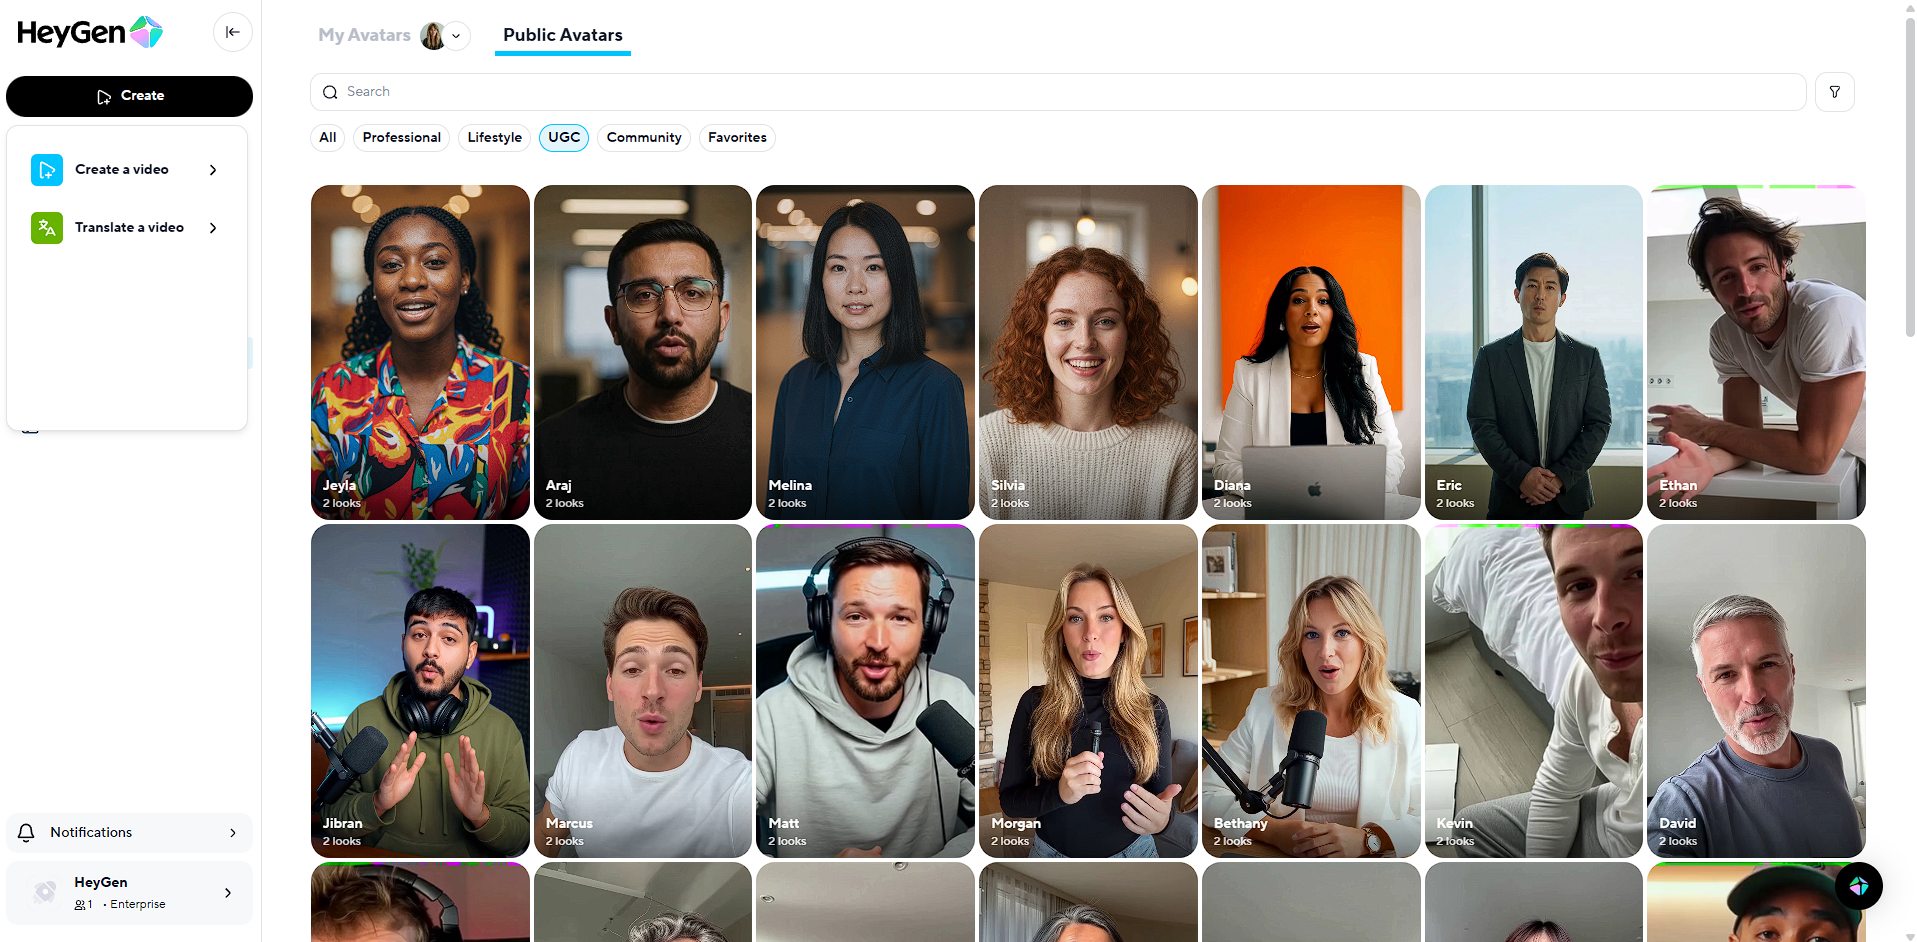
To start, log in to your HeyGen account and click ‘Avatars’ on the Left side of the screen.
From there, select Create Virtual Character, then choose Upload Photo.
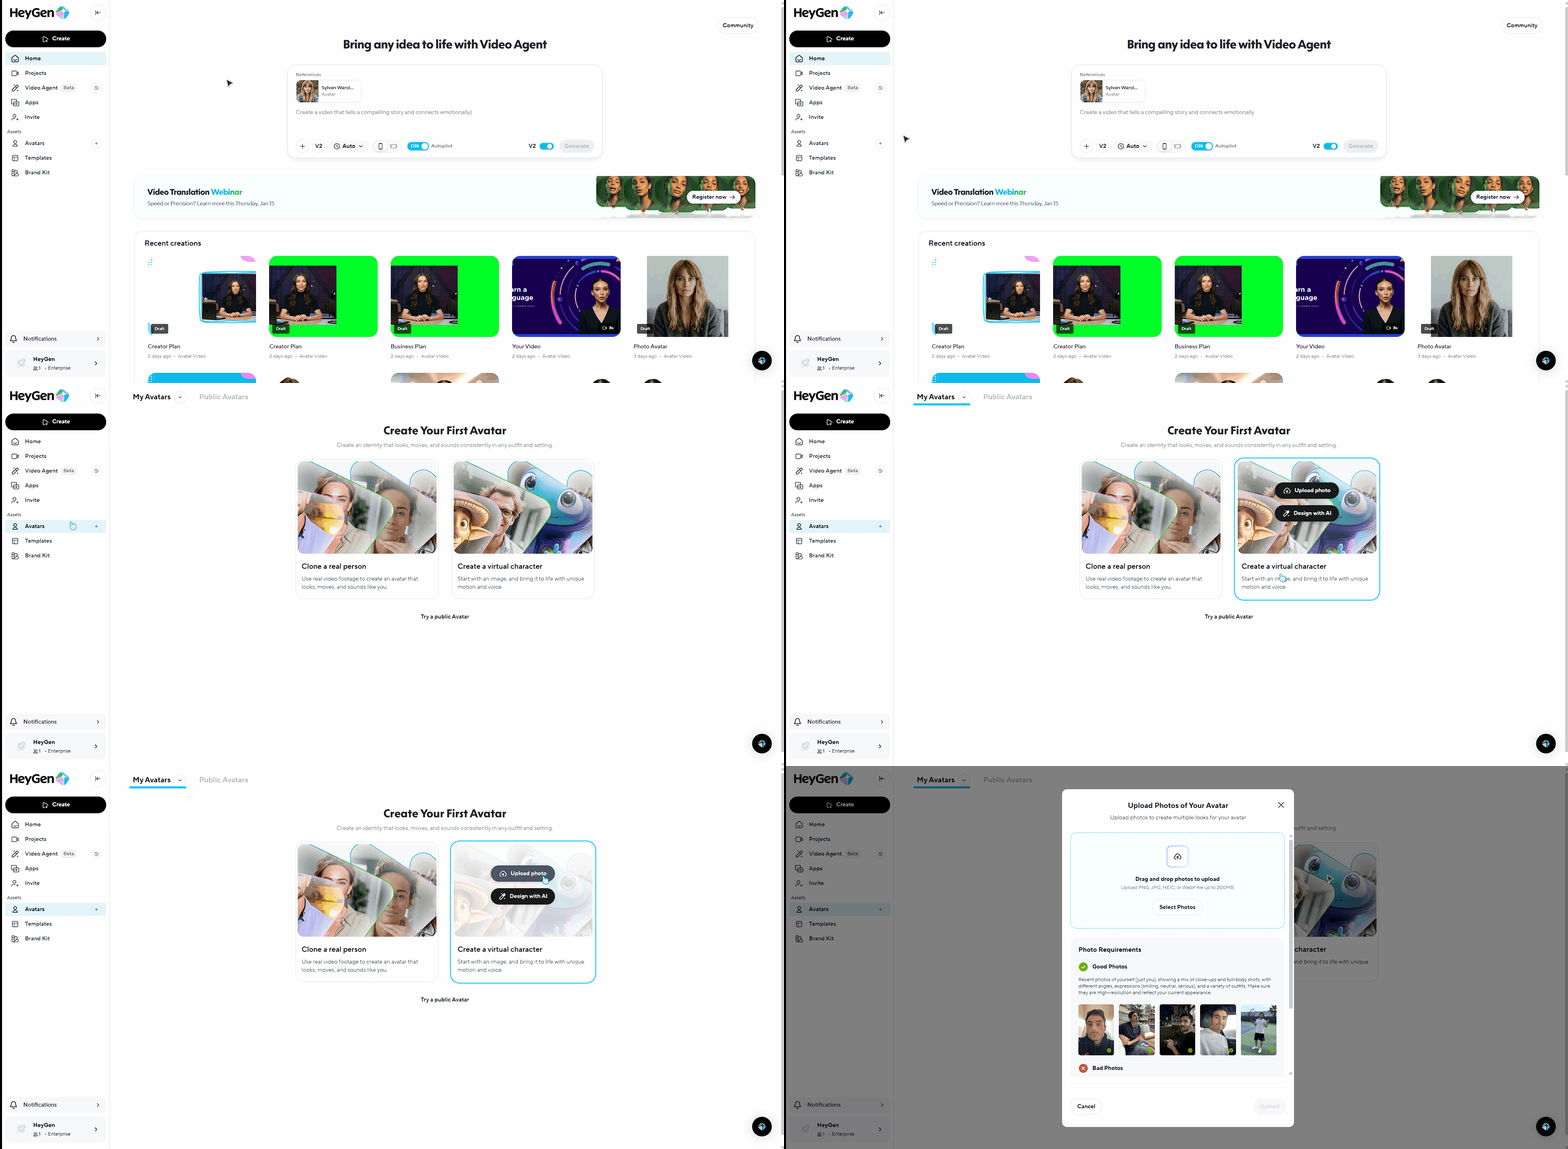
If you already have an avatar created, click the arrow in the top-left next to My Avatars, then click New Avatar to create a new one.
From there, select Create Virtual Character, then choose Upload Photo.
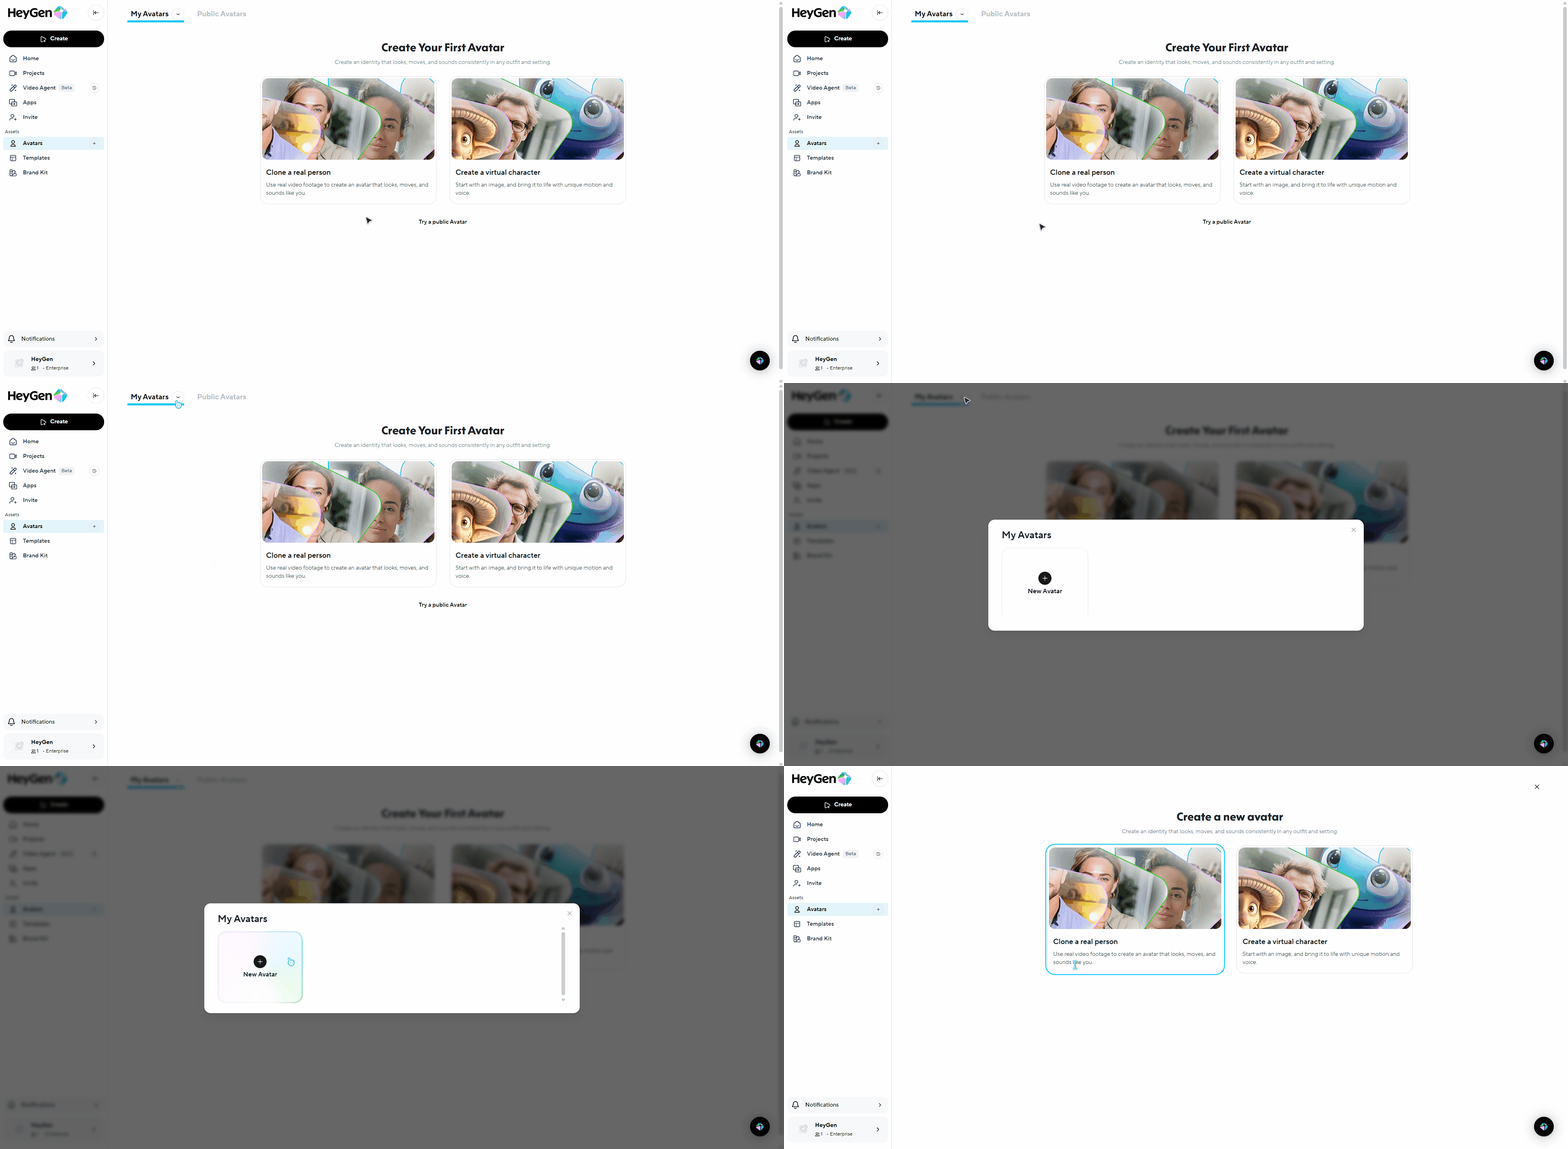
After selecting Upload Photo, you’ll be prompted to upload your image. For best results, use a high-quality, well-lit photo.
Once your image is uploaded, you’ll be asked to review it. If everything looks correct, click Continue to move forward.
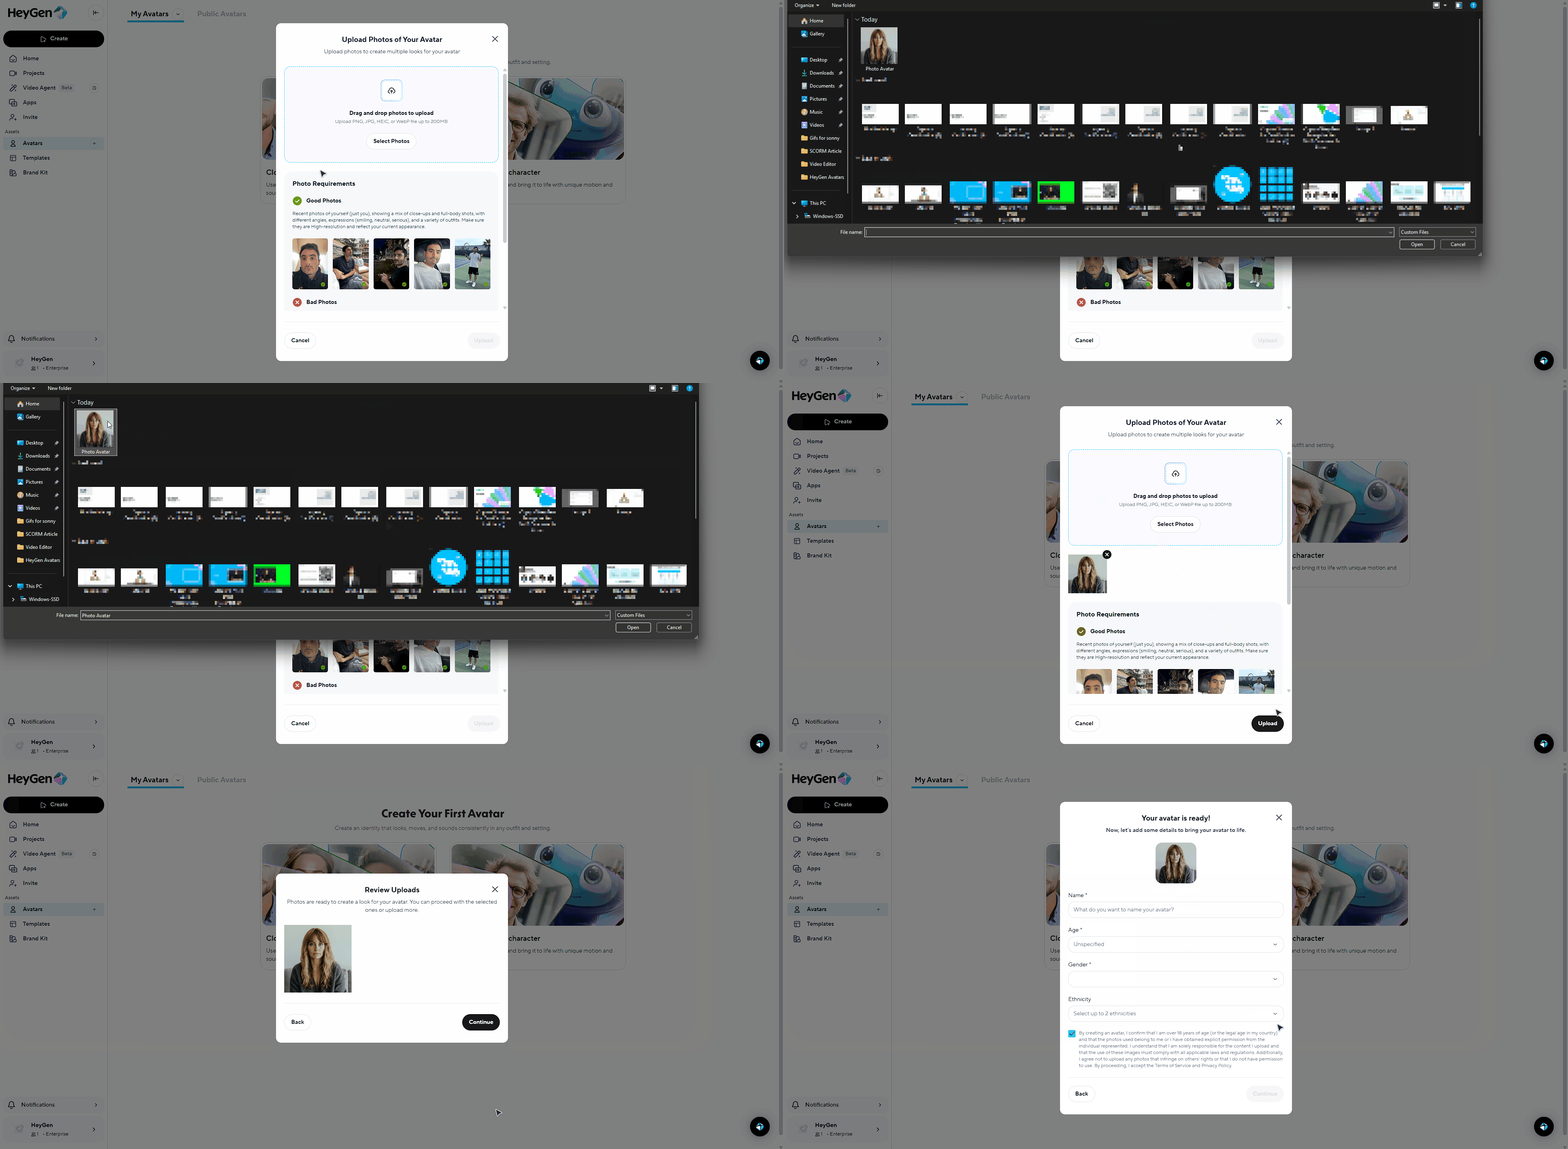
After your images are uploaded, you’ll be prompted to enter your avatar’s details, including name, age, gender, and race. Fill in this information to help HeyGen generate a more accurate and consistent character.
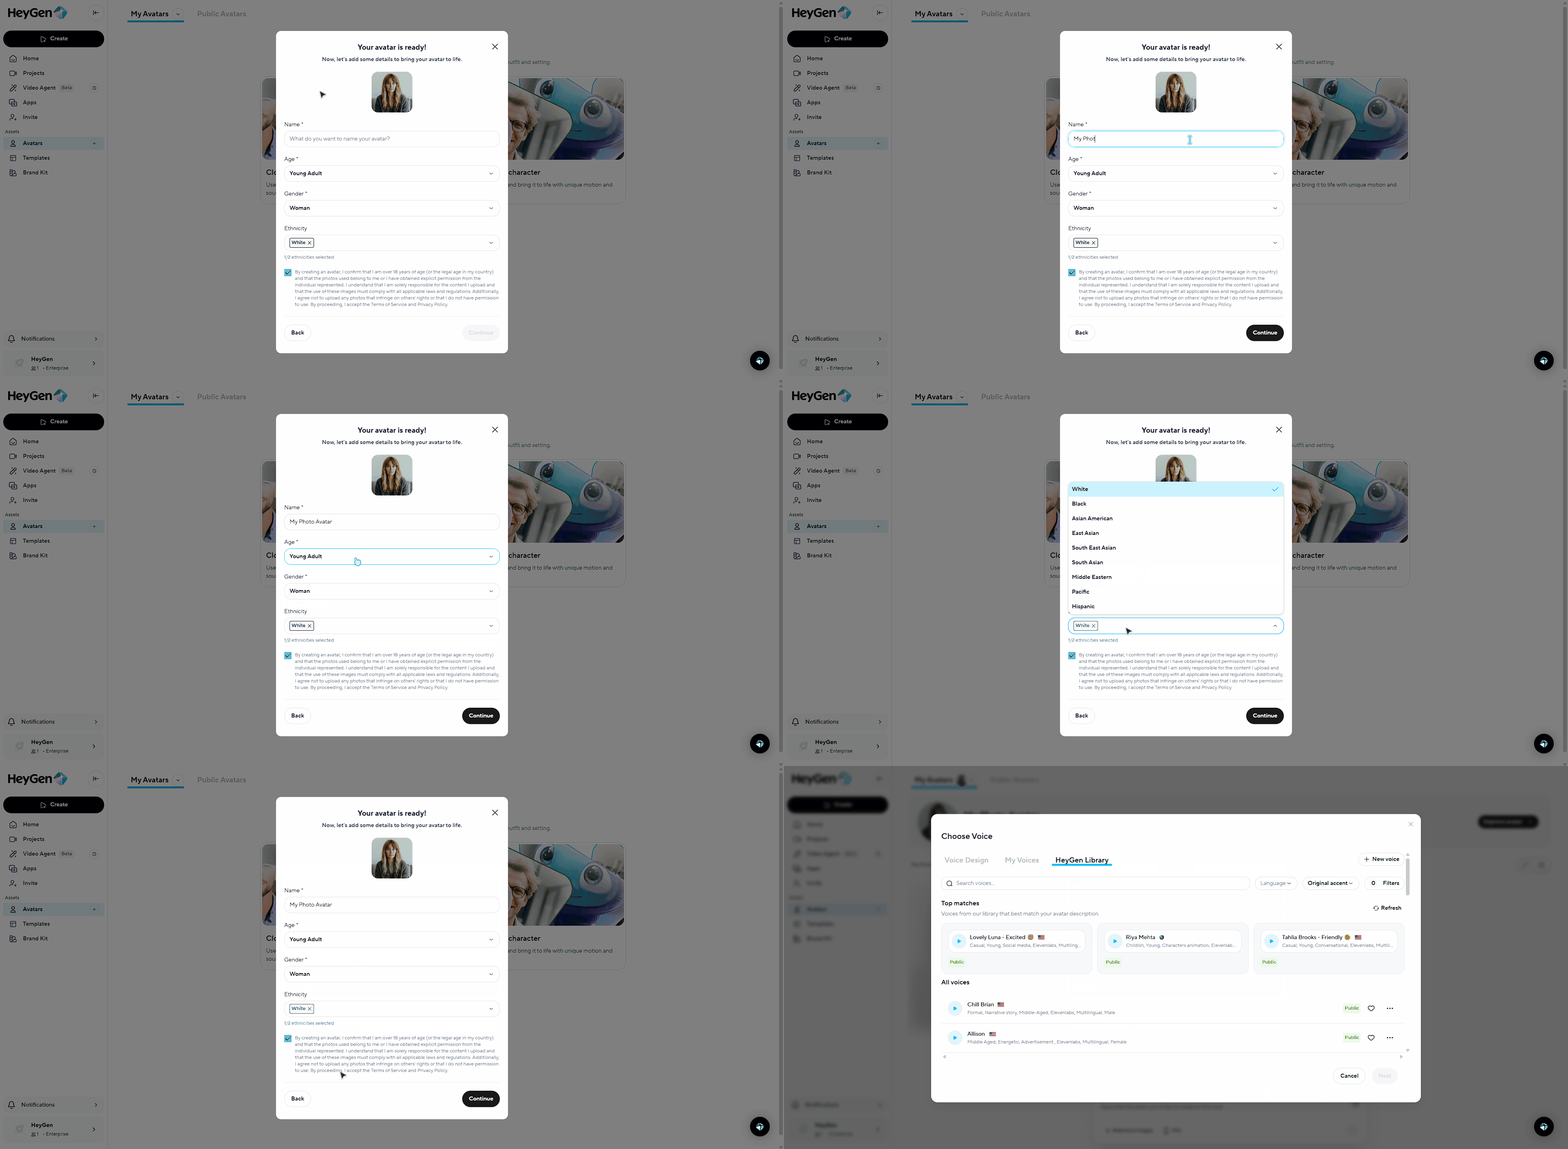
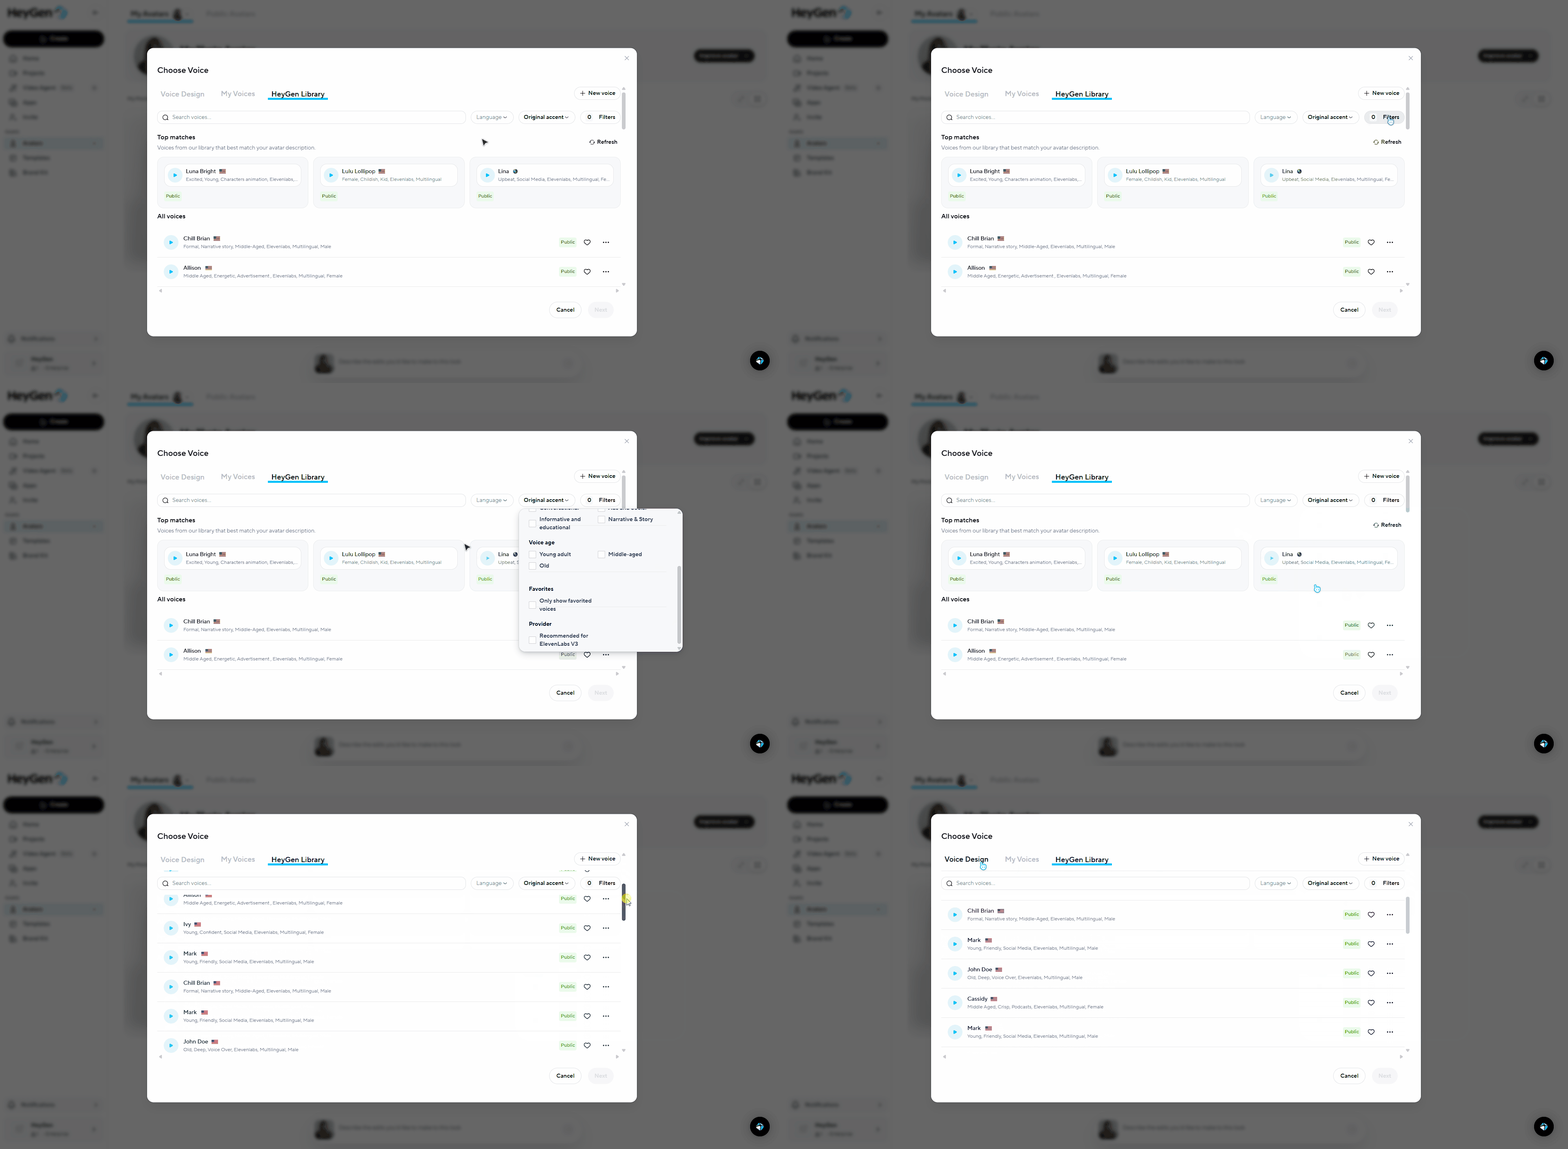
Next, you’ll select a voice for your avatar. HeyGen will recommend voices based on your avatar’s profile, but you can create a new voice, or browse and search the full voice library to find the one that best fits your style and tone. If you’d like a deeper walkthrough, check out our guide on using HeyGen AI Voice for high-quality video narration .
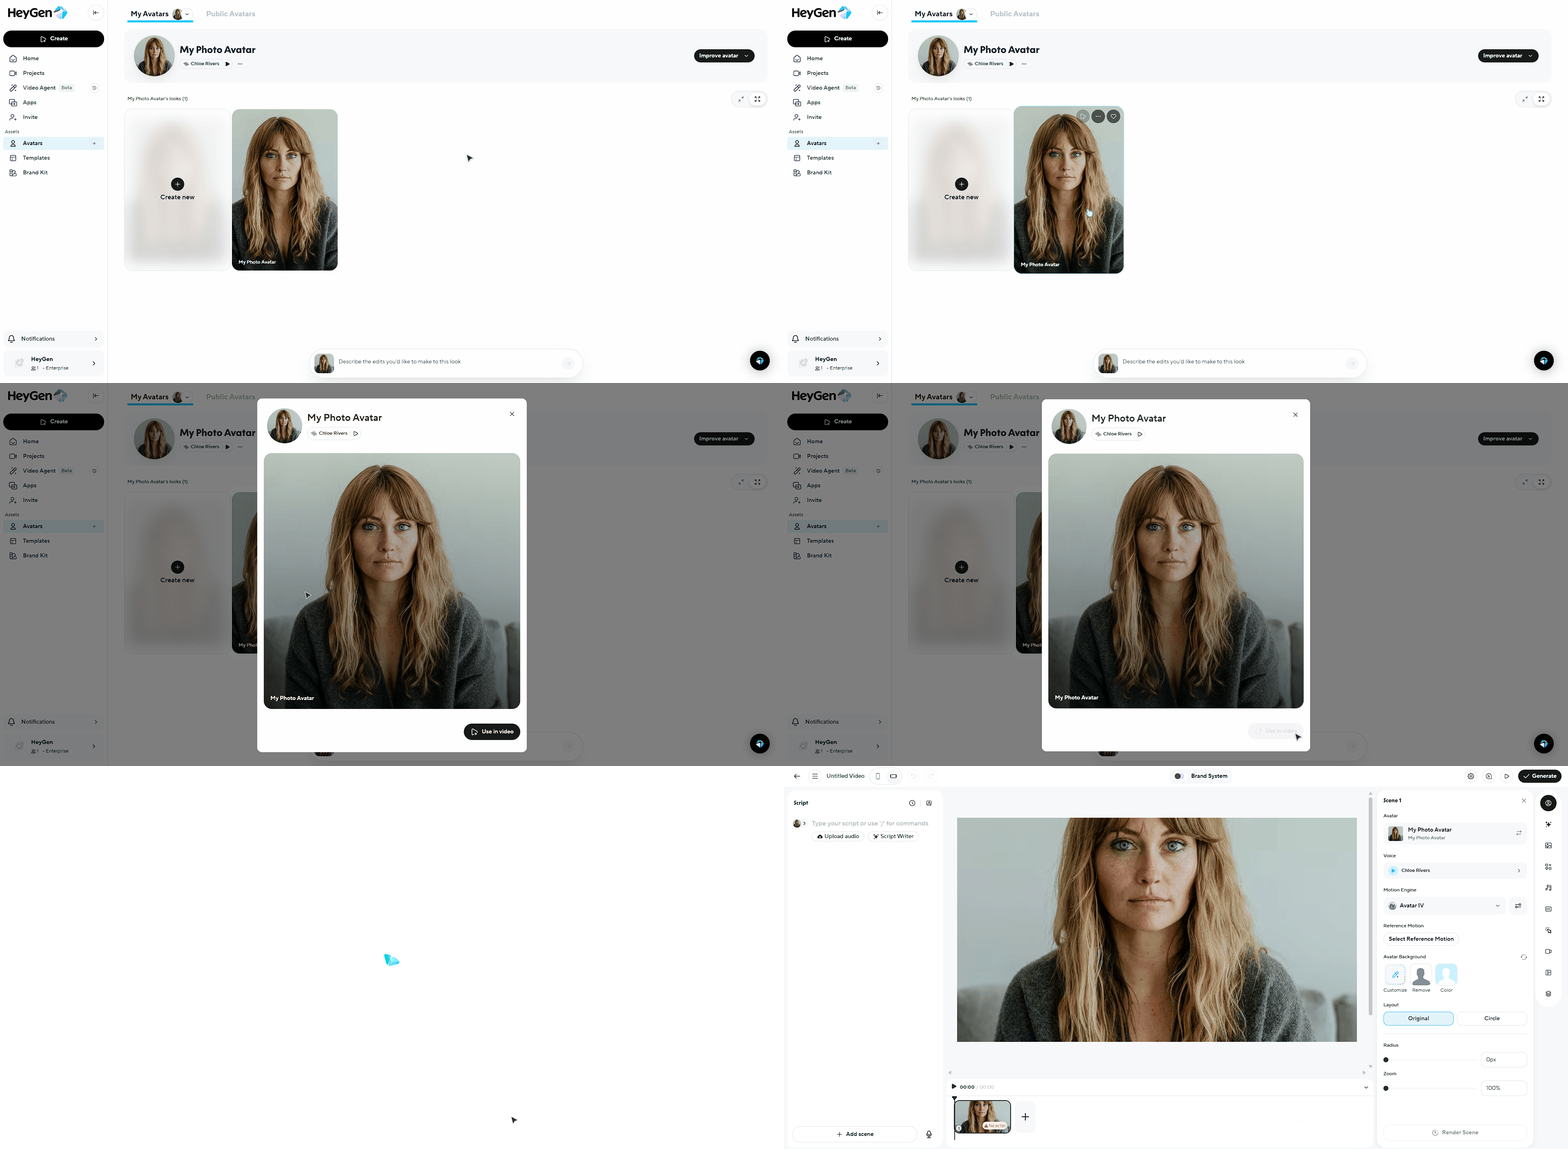
Adding Motion
To start creating with your avatar, click the avatar and select 'Use in Video' to open it in AI Studio.
Motion Engines
HeyGen offers three motion engines that control how your avatar moves, speaks, and behaves on screen. Each engine is optimized for different types of content, from fast, scalable production to cinematic storytelling.
To add motion, click ‘Avatar’ in the top-right corner (the small person icon). First, select your Motion Engine. After choosing an engine, click Advanced Settings to view and adjust the motion options available for that engine.
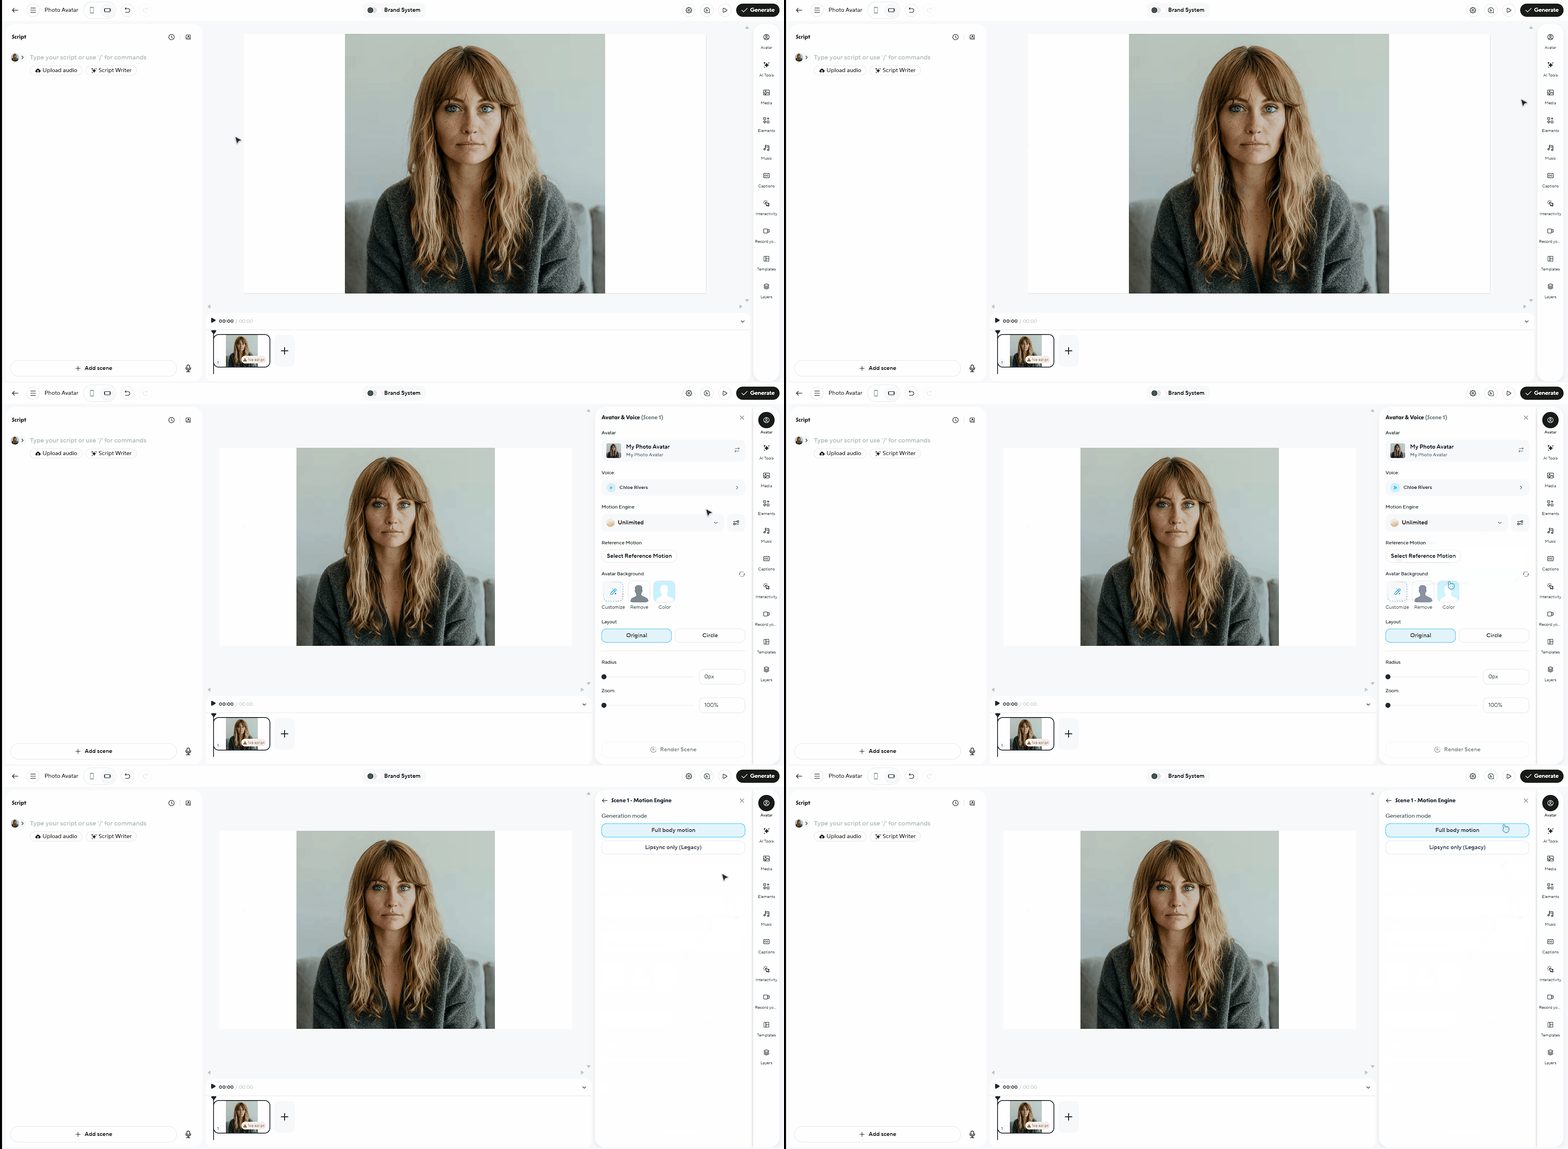
Avatar III
Avatar III is HeyGen's fast, cost-efficient motion engine designed for everyday video creation. It provides natural lip-sync and smooth talking motion, making it ideal for high-volume production, simple talking-head videos, and automated workflows. Avatar III video generation costs 3 credits per minute from your plan's credit balance.
To configure Avatar III, go to Avatar → Motion Engine, select Avatar III, then click Advanced Settings. You'll see two options:
- Full body motion – The default and recommended setting, giving your avatar natural head, face, and body movement.
- Lipsync only (Legacy) – A fallback mode that limits movement to mouth animation only, useful when you want minimal motion or maximum visual consistency.
Avatar IV
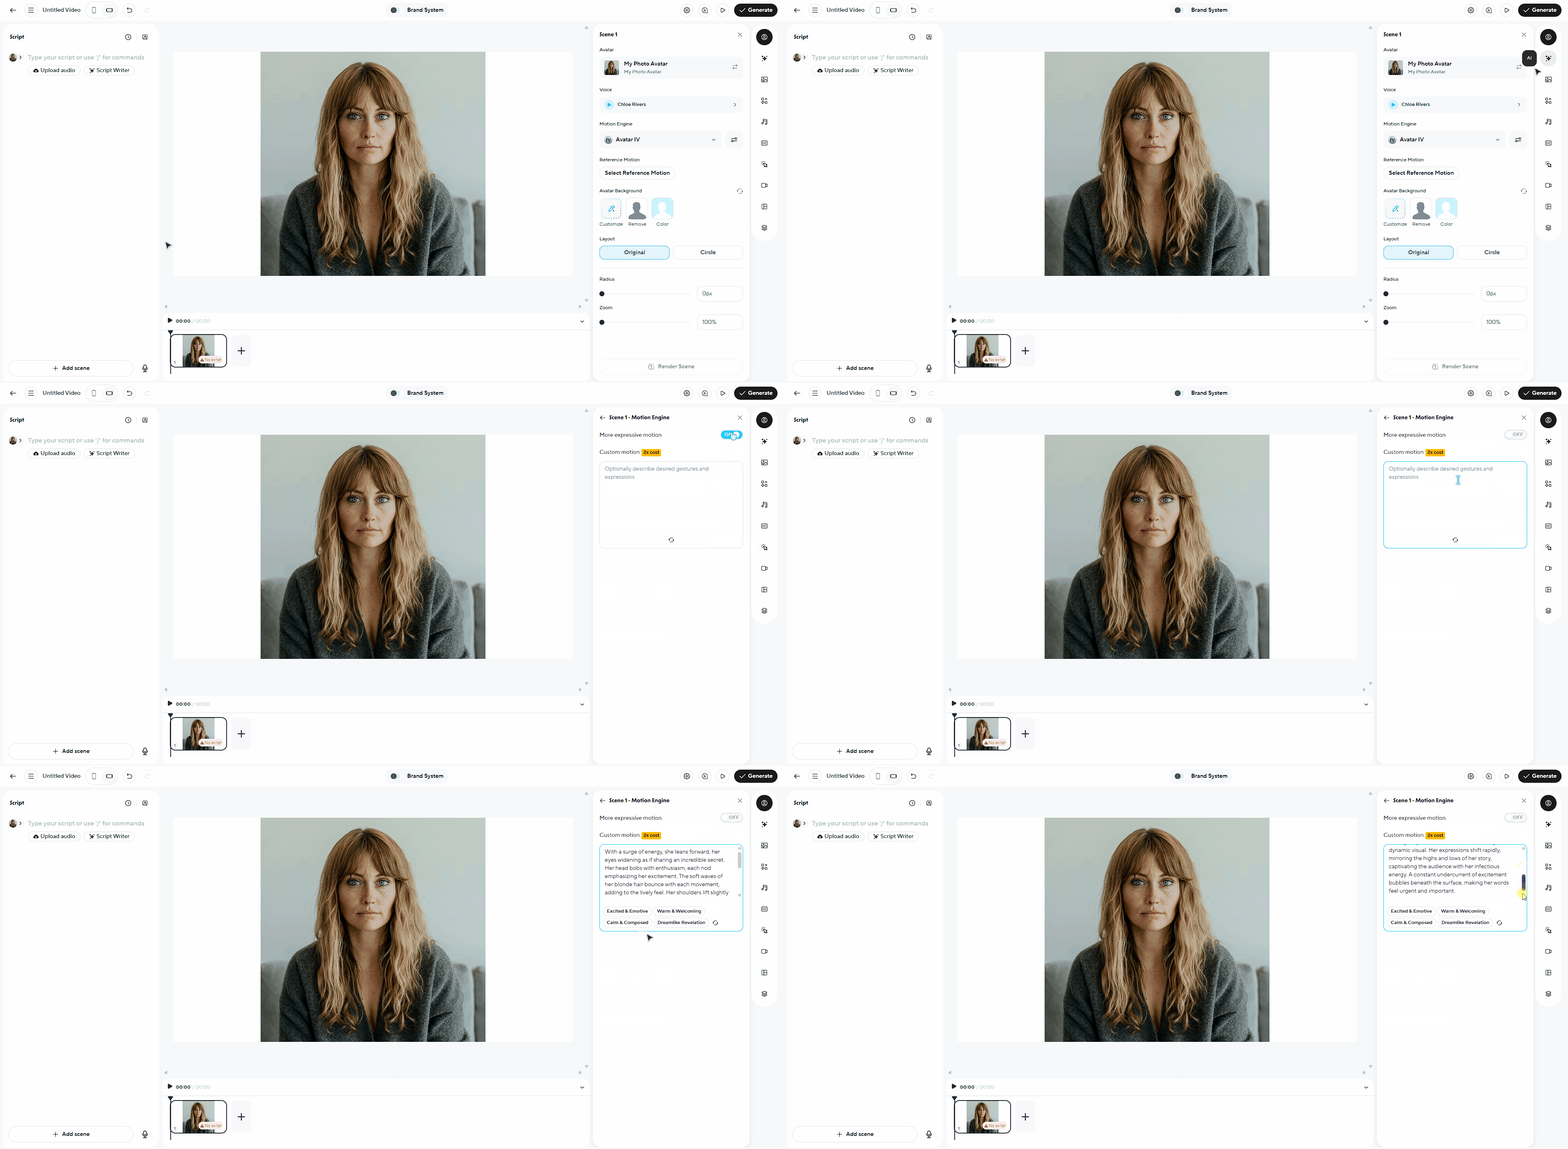
Avatar IV produces highly realistic facial expressions, head movement, and upper-body motion driven by your voice. It’s built for premium, human-like performances where emotion and presence matter.
To configure Avatar IV, go to Avatar → Motion Engine, select Avatar IV, then click Advanced Settings. You’ll see:
- More expressive motion – Enables richer facial expressions, head movement, and emotional delivery.
- Custom motion – A prompt box where you can guide how the avatar moves, such as gestures, posture, or emphasis.
Kling
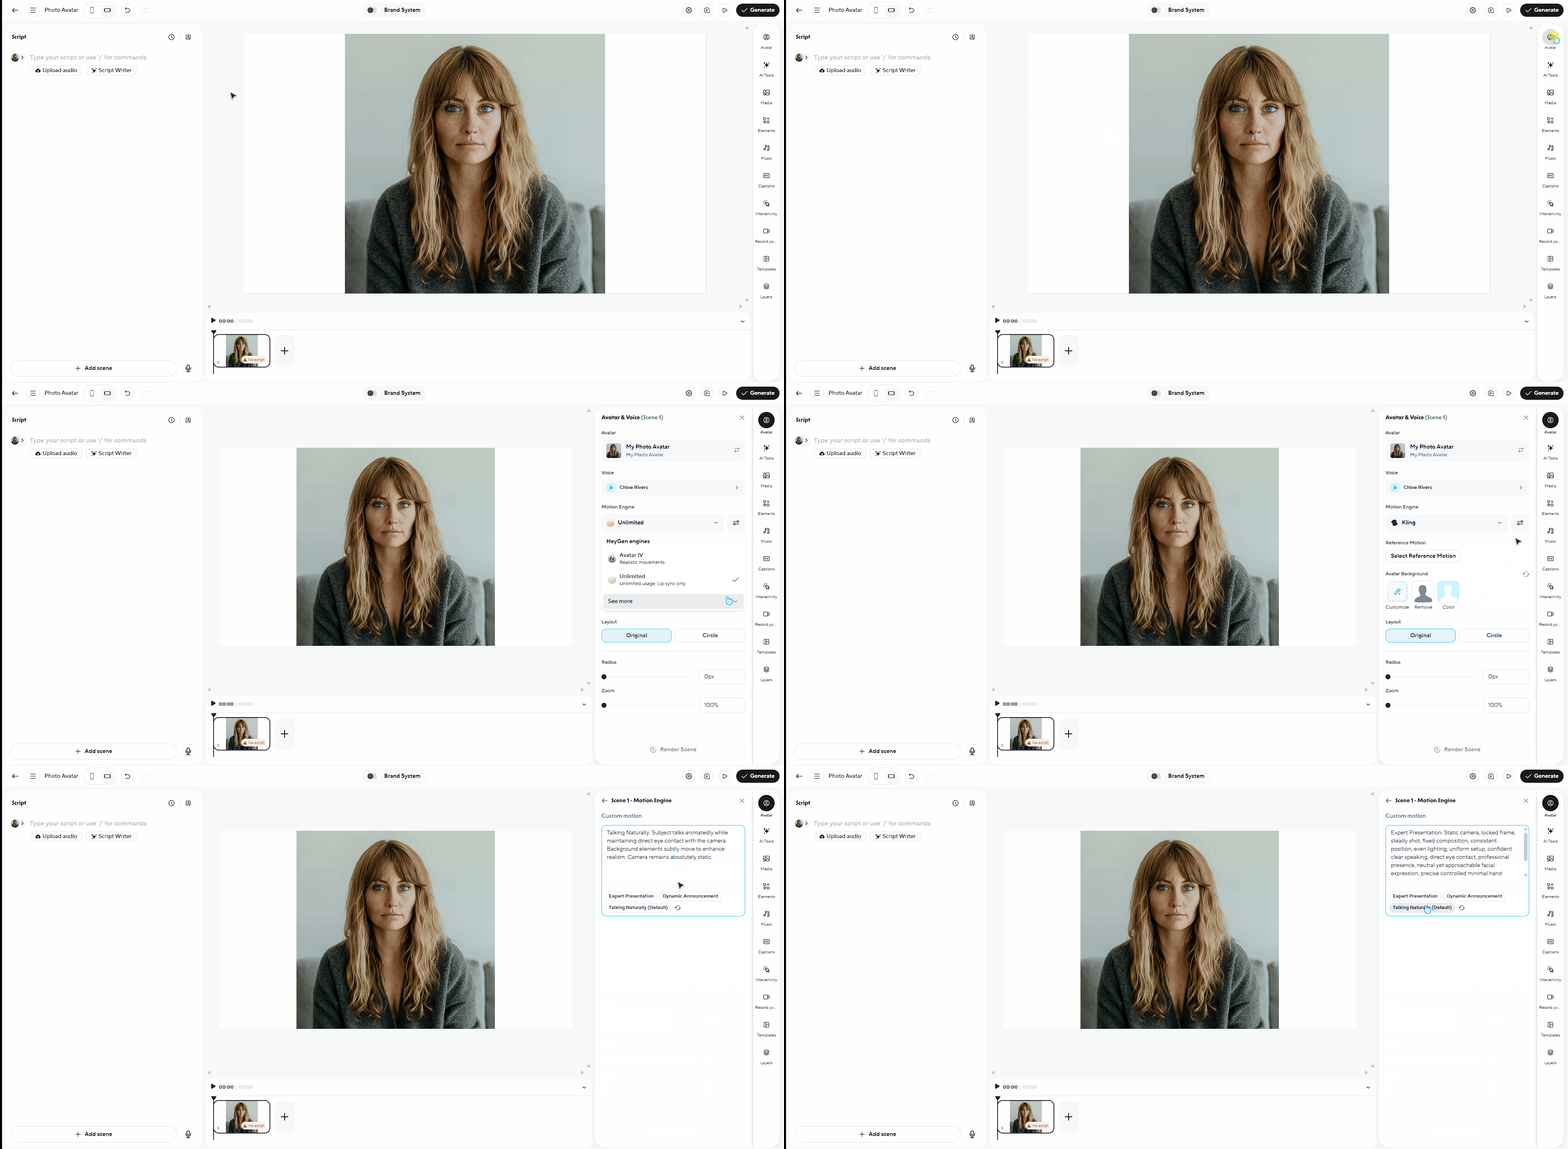
Kling is a prompt-driven cinematic motion engine designed for storytelling and visually rich scenes. It creates dramatic, film-style movement and stylized avatar behavior.
When to use it: Use Kling when you want cinematic motion, creative visuals, or story-driven performances.
To configure Kling, go to Avatar → Motion Engine, select Kling, then click Advanced Settings. Kling uses:
- Custom motion – Enter a prompt to describe how your avatar should move, gesture, or behave on screen.
Generating Looks
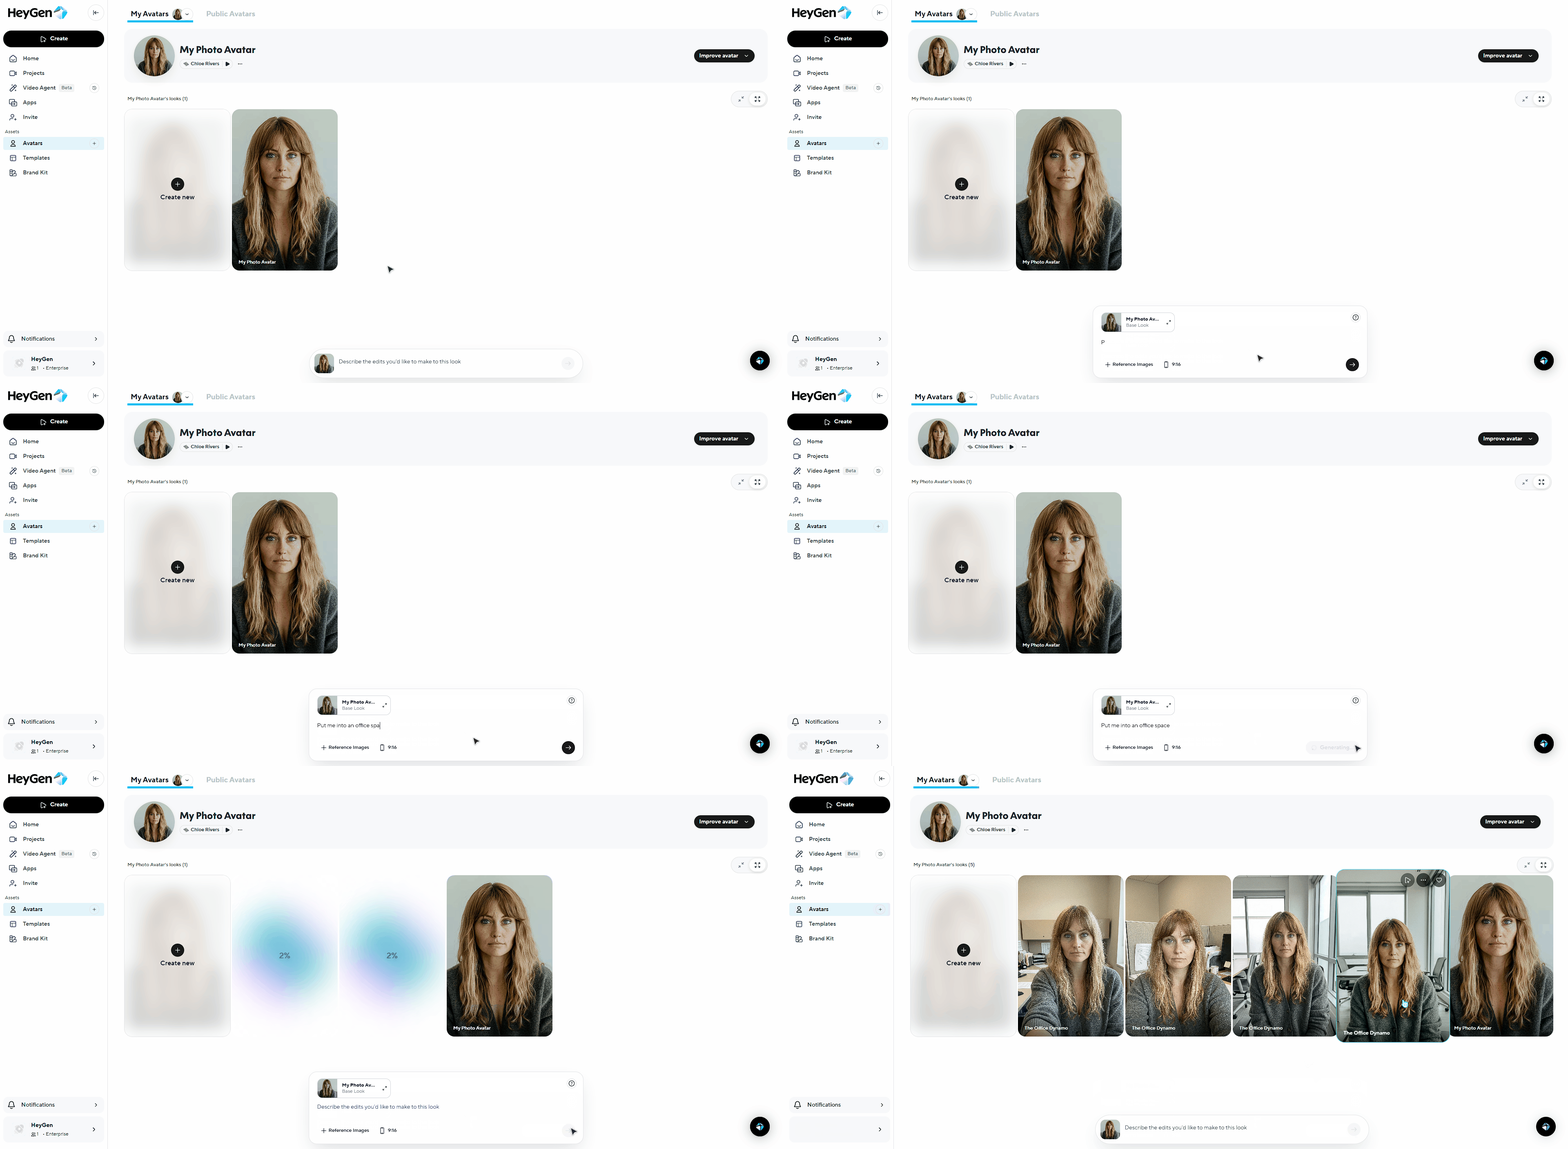
You can generate different Looks for your avatar directly from the Avatars tab. Simply enter a short description of how you want your avatar to appear, and HeyGen will generate a new version of your avatar in that setting.
You can also upload reference images to guide the look, such as placing products in your avatar’s hands or changing the environment. For example, a simple prompt like “put me in an office space” will place your avatar into a professional office setting, ready to use in your videos.
If you're new to look generation or want more inspiration, check out our step-by-step guide to generating photo avatar looks .
Recap
In this guide, you learned:
- What Photo Avatars are
- How to create a Photo Avatar
- How to customize your Photo Avatar
- How to save and use your Photo Avatar
We’re looking forward to seeing what you’ll create with HeyGen!
Comments (0)
Popular

Dive in