Managing multiple teams or projects within HeyGen can get complicated, especially when different teams need different levels of access. That’s where Sub-Workspaces come in! With this feature, you can create separate environments, assign members, and manage billing or API settings effortlessly.
What’s covered in this guide
In this tutorial, we’ll walk you through:
- Navigating to Sub-Workspaces
- Creating a Sub-Workspaces
- Managing Members, Permissions, and Credits
- Moving avatars to Sub-Workspaces
- Sharing Brand Kits and Templates Across Sub-Workspaces
What are Sub-Workspaces?
Sub-Workspaces are separate environments within a HeyGen account that allow for better team and project management. Each Sub-Workspaces has its own members, permissions, and settings.
Sub-Workspaces help agencies and enterprises control access, billing, and API usage across different teams or clients. Sub-Workspaces can be configured to share or separate resources such as billing, avatars, API keys, and templates.
Navigating to Sub-Workspaces
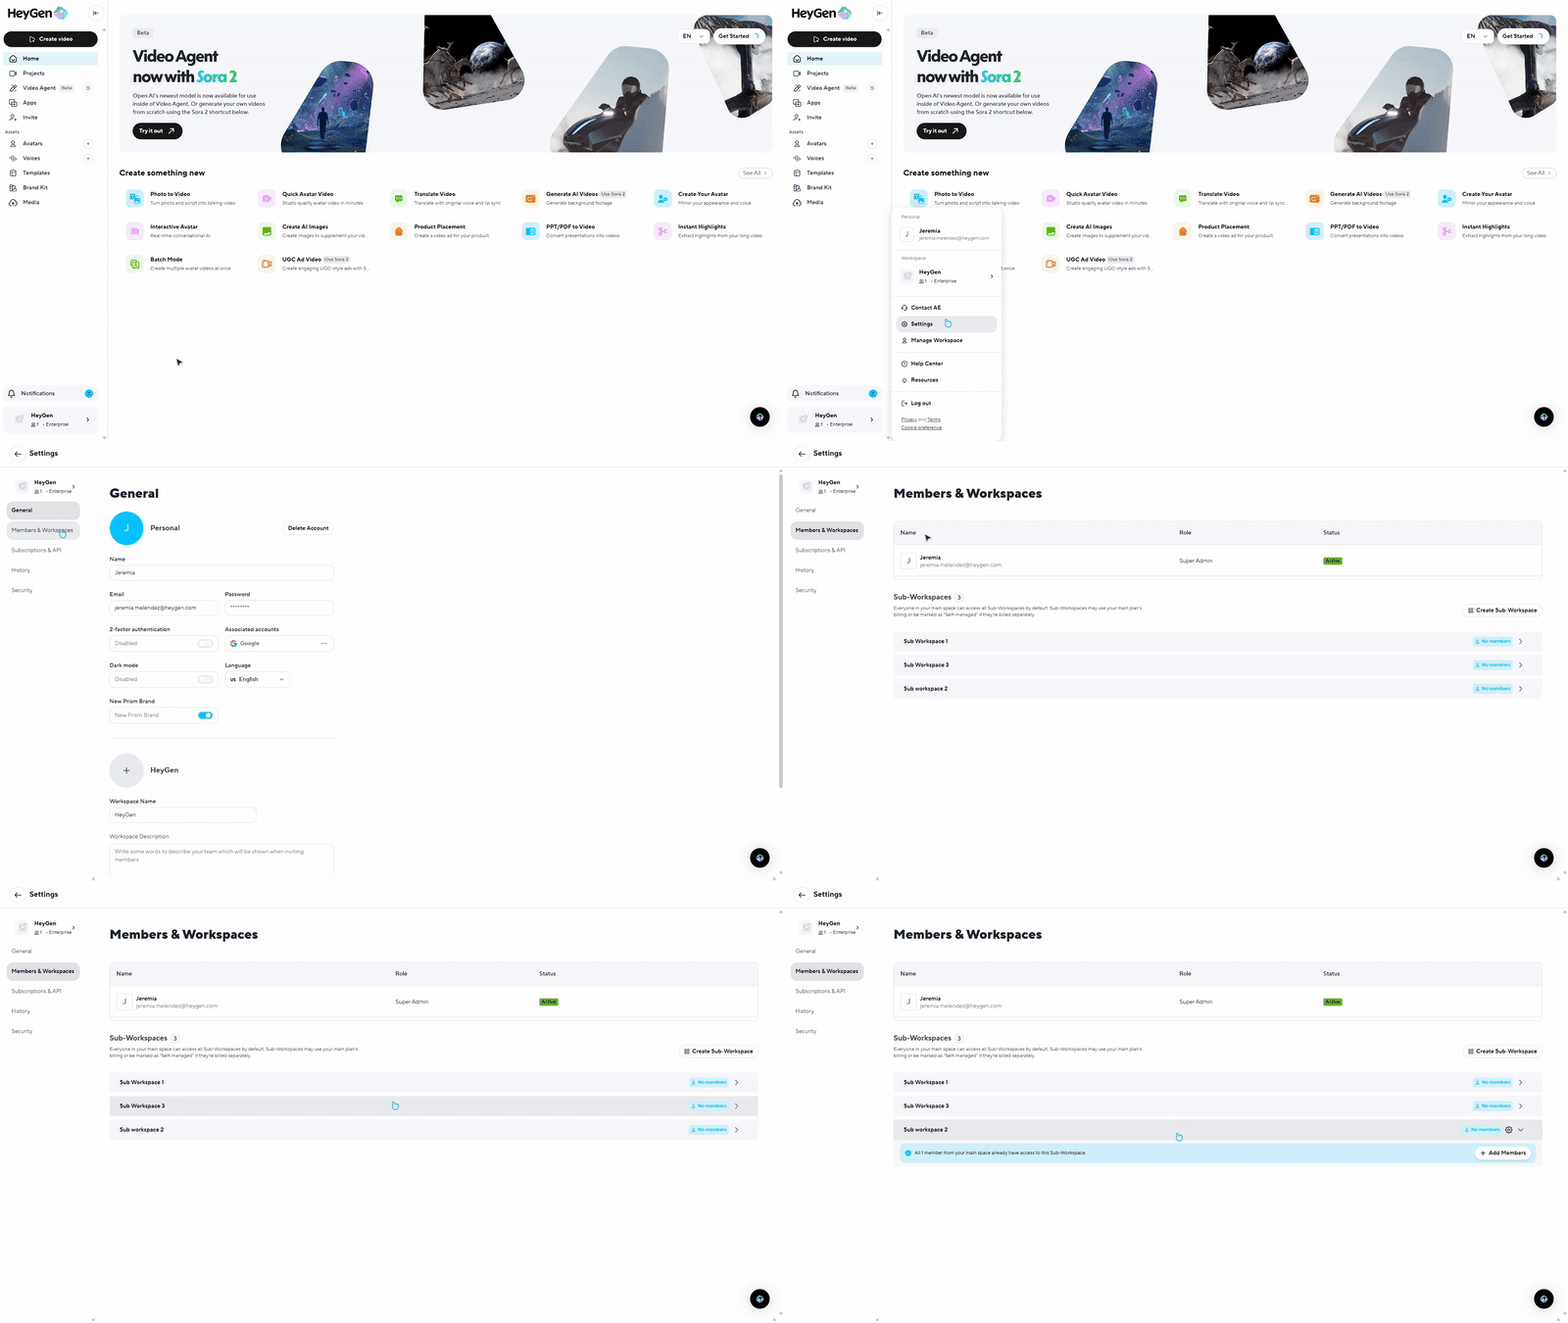
From your dashboard, click on your name, and go to "Space Settings". From there you can navigate to "Members." You’ll see the "Sub-Workspaces" option in this menu.
Creating a Sub-Workspace
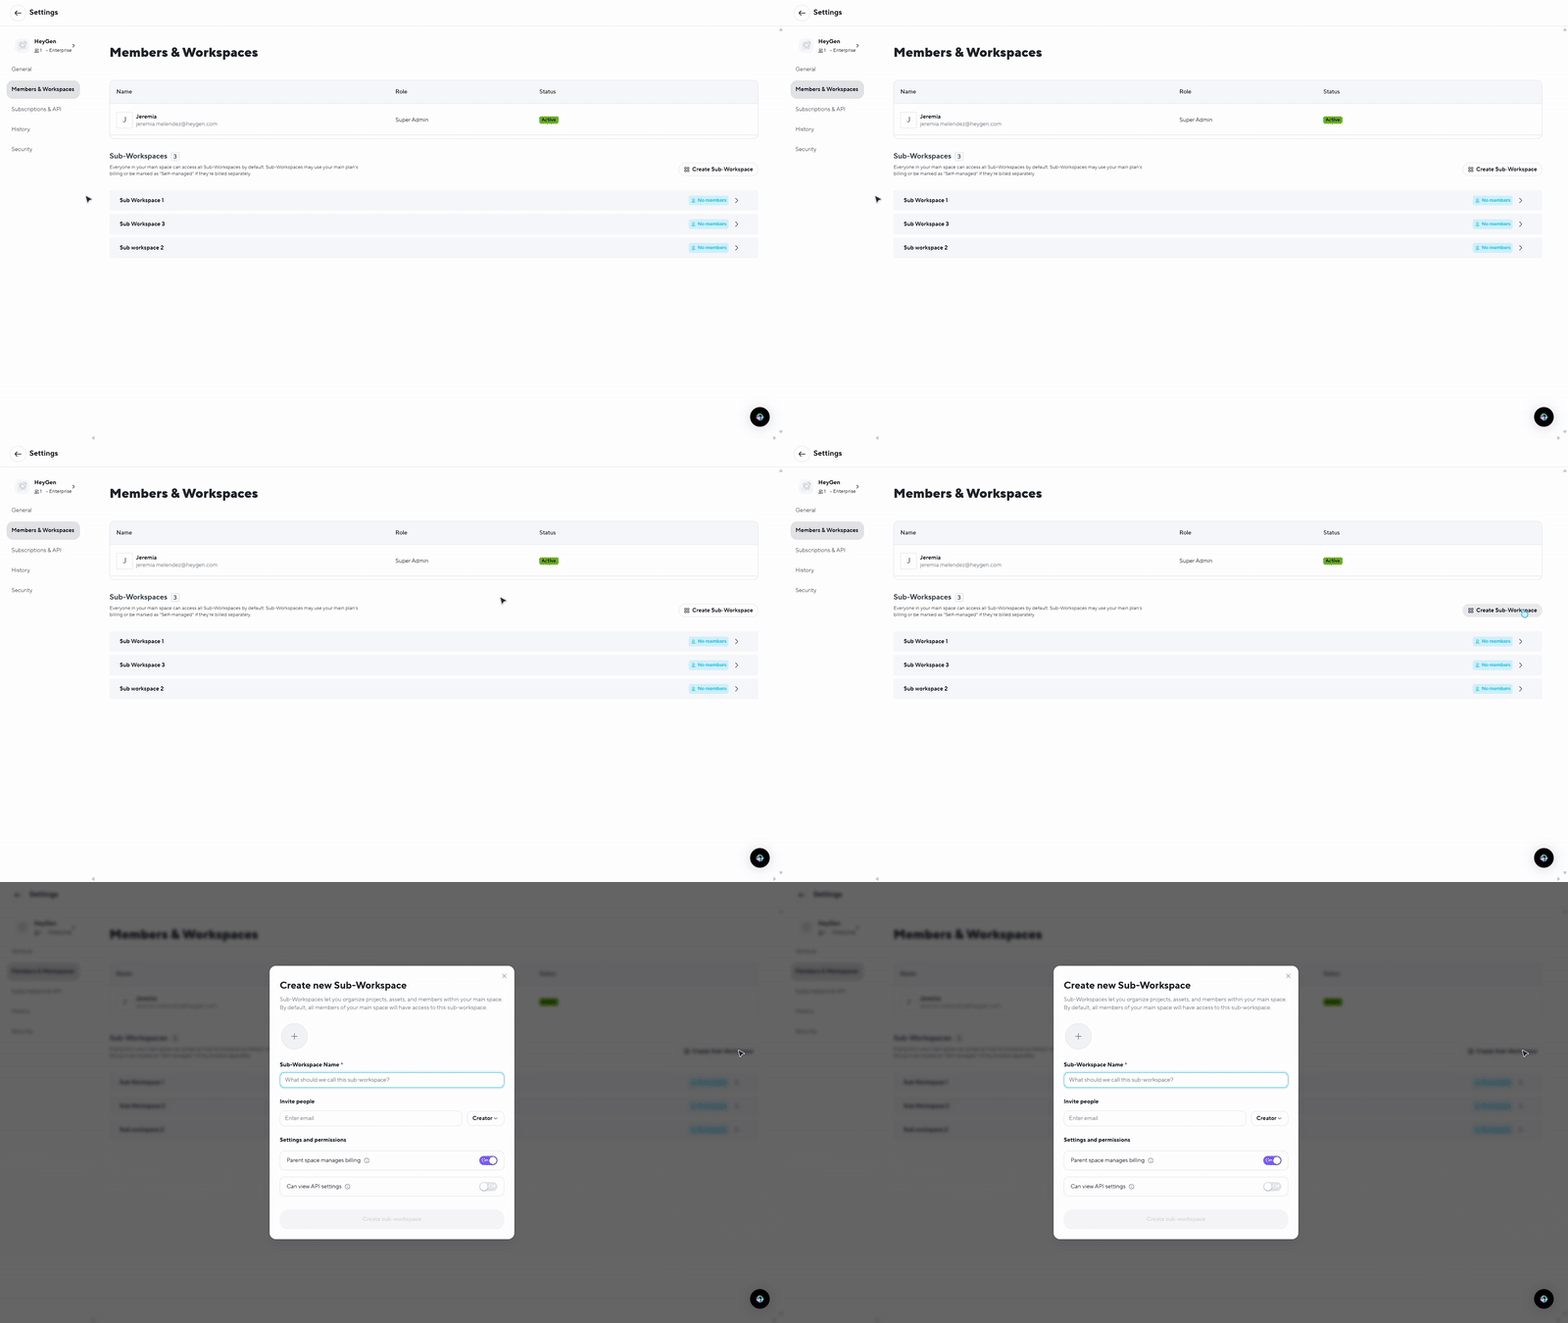
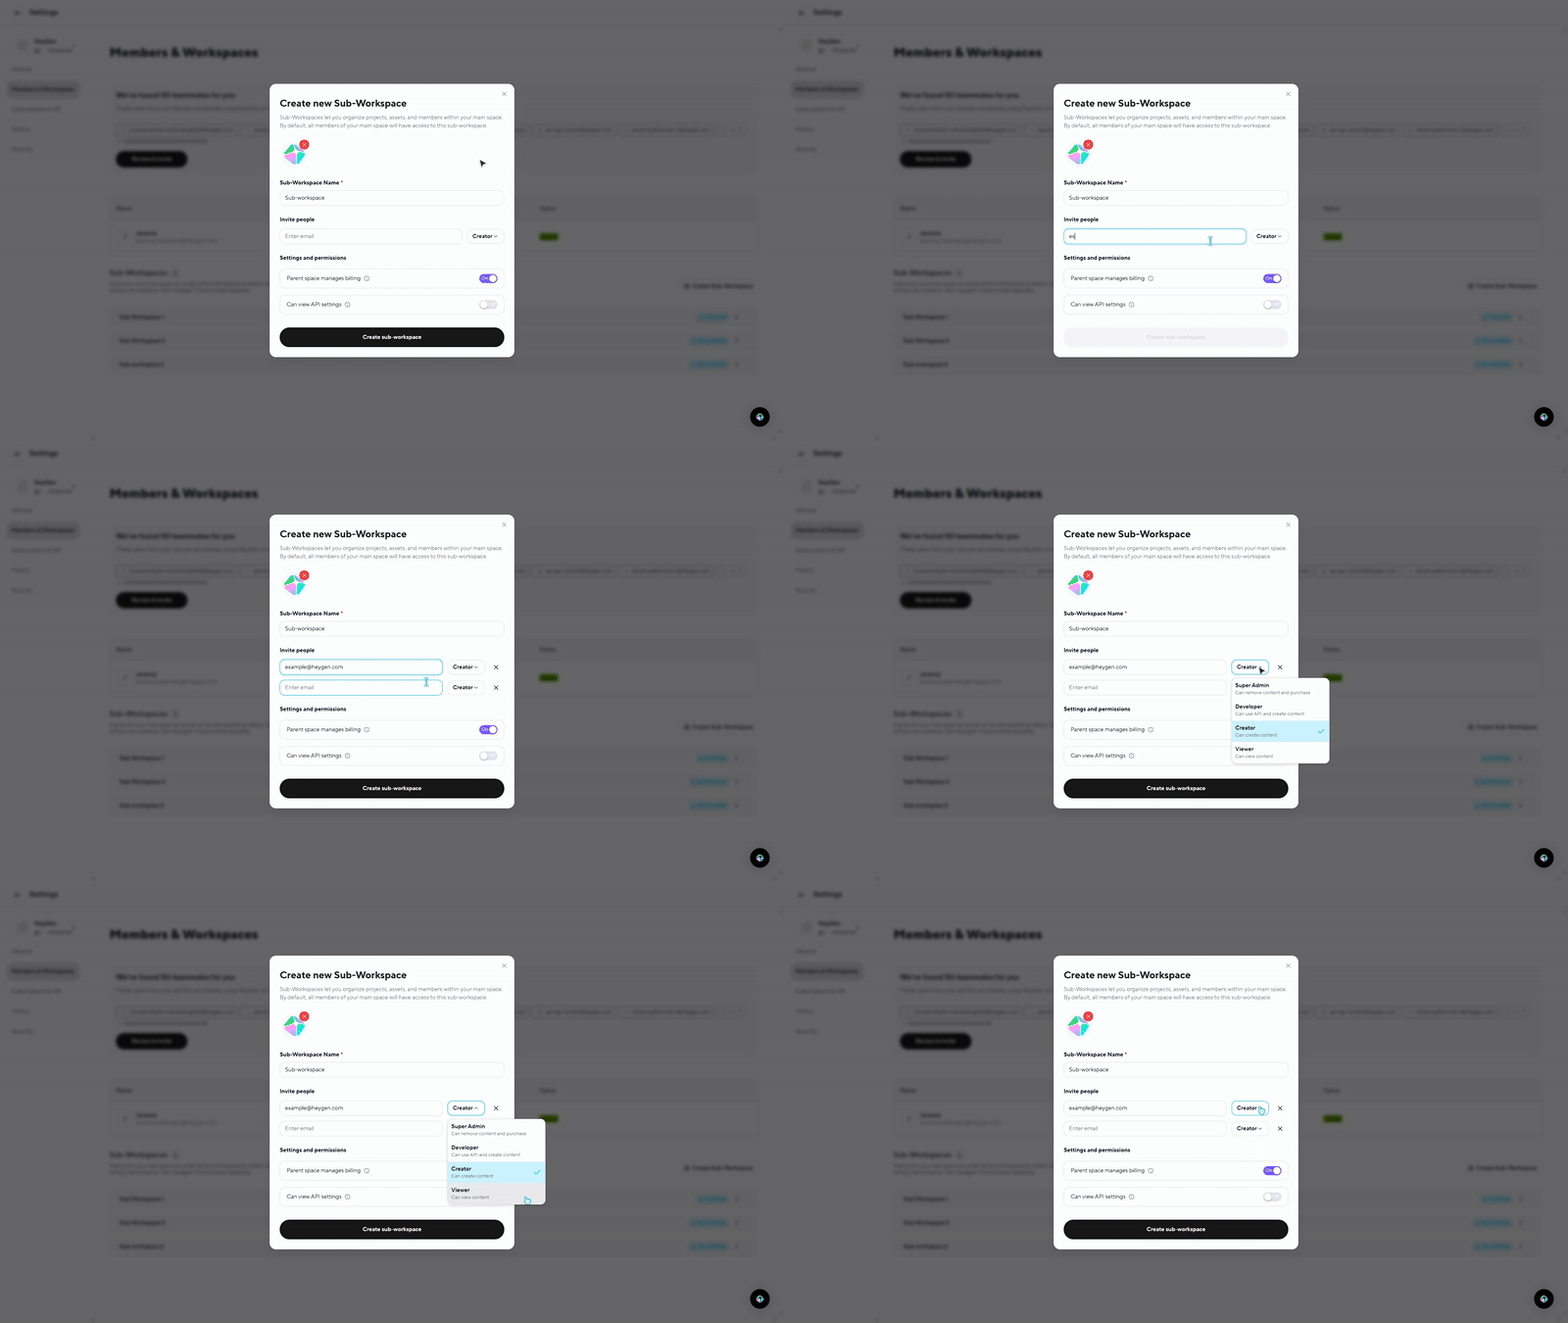
To create a new Sub-Workspace, click on “Create Sub-Workspace”
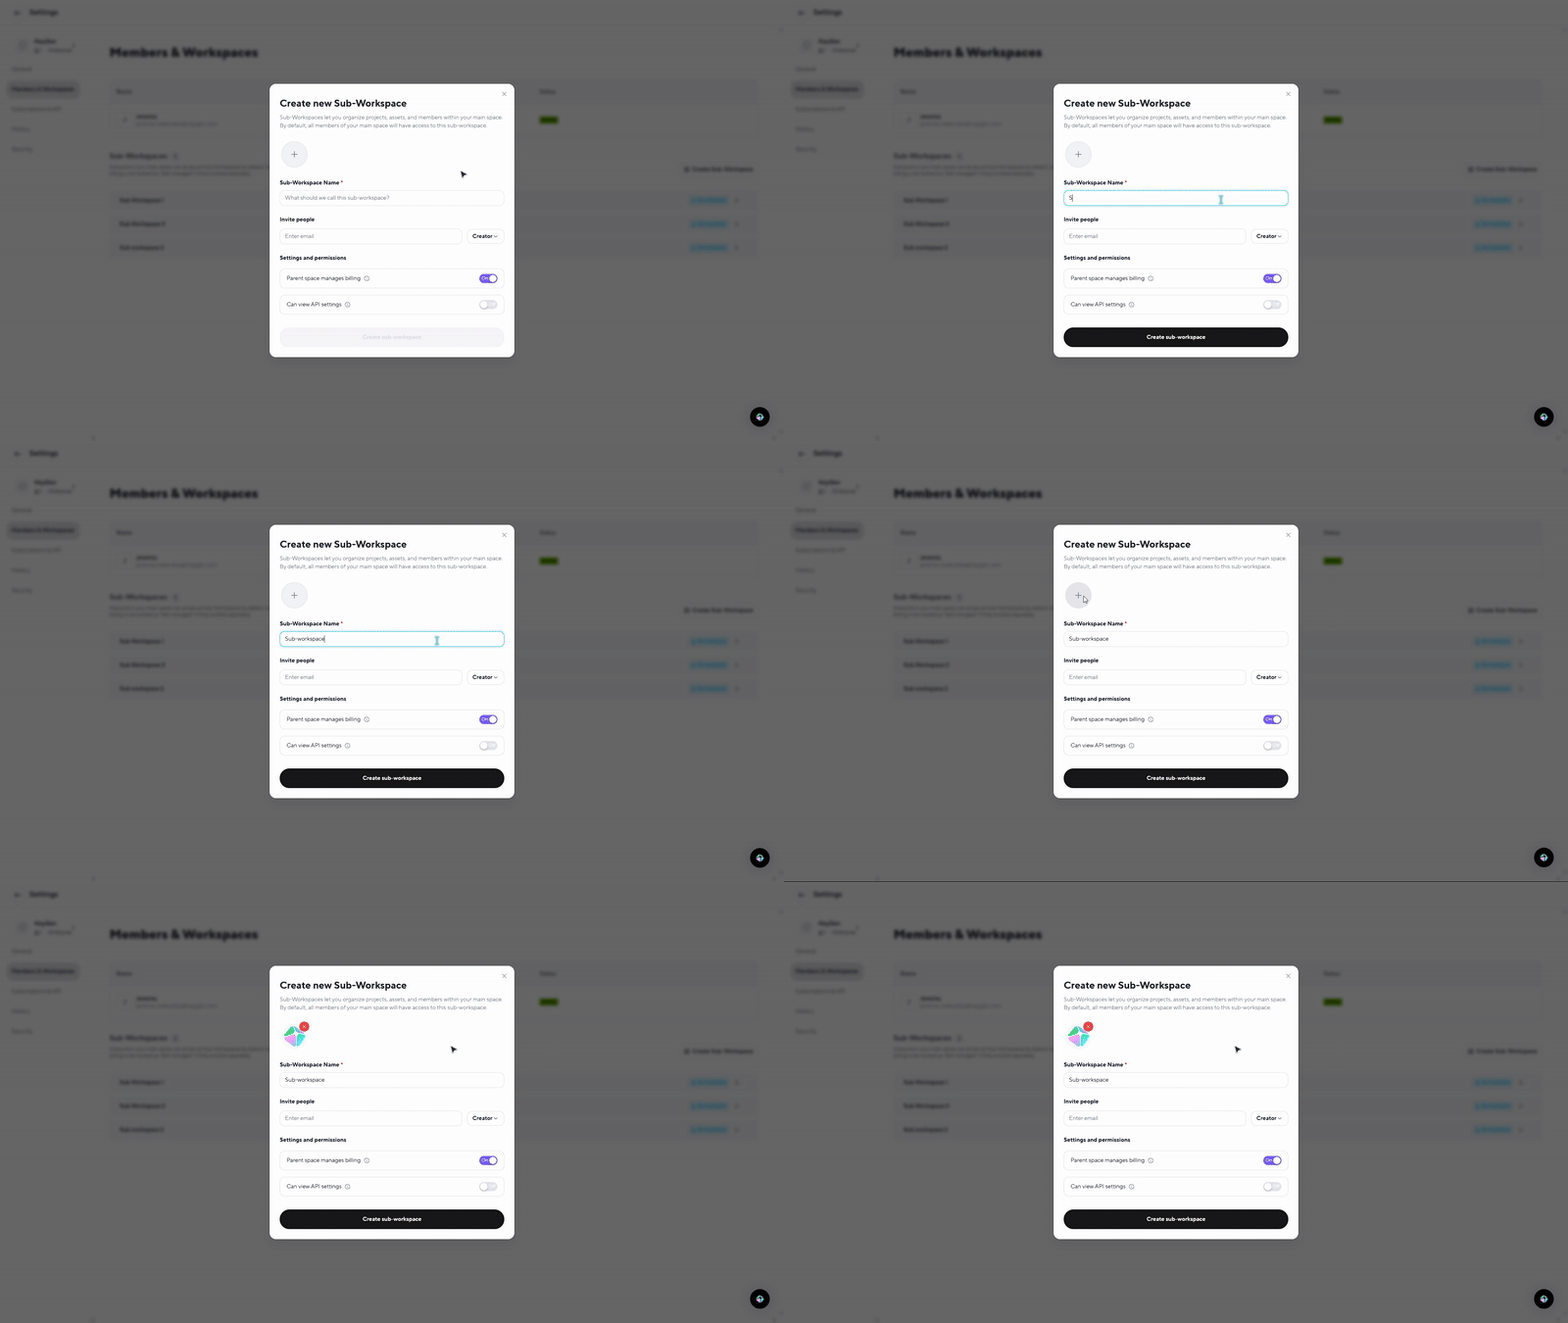
Begin by entering a name for your Sub-Workspaces and an image of your choice.
Next up, enter an email to invite new members. Then, select their role in the space:
- Super admin - Full permissions, including adding new users, managing access, and handling purchases
- Developer - Creates content and has API access; ideal for advanced integrations
- Creator - Can create avatars, videos, and voices
- Viewer - Can view content but cannot make changes
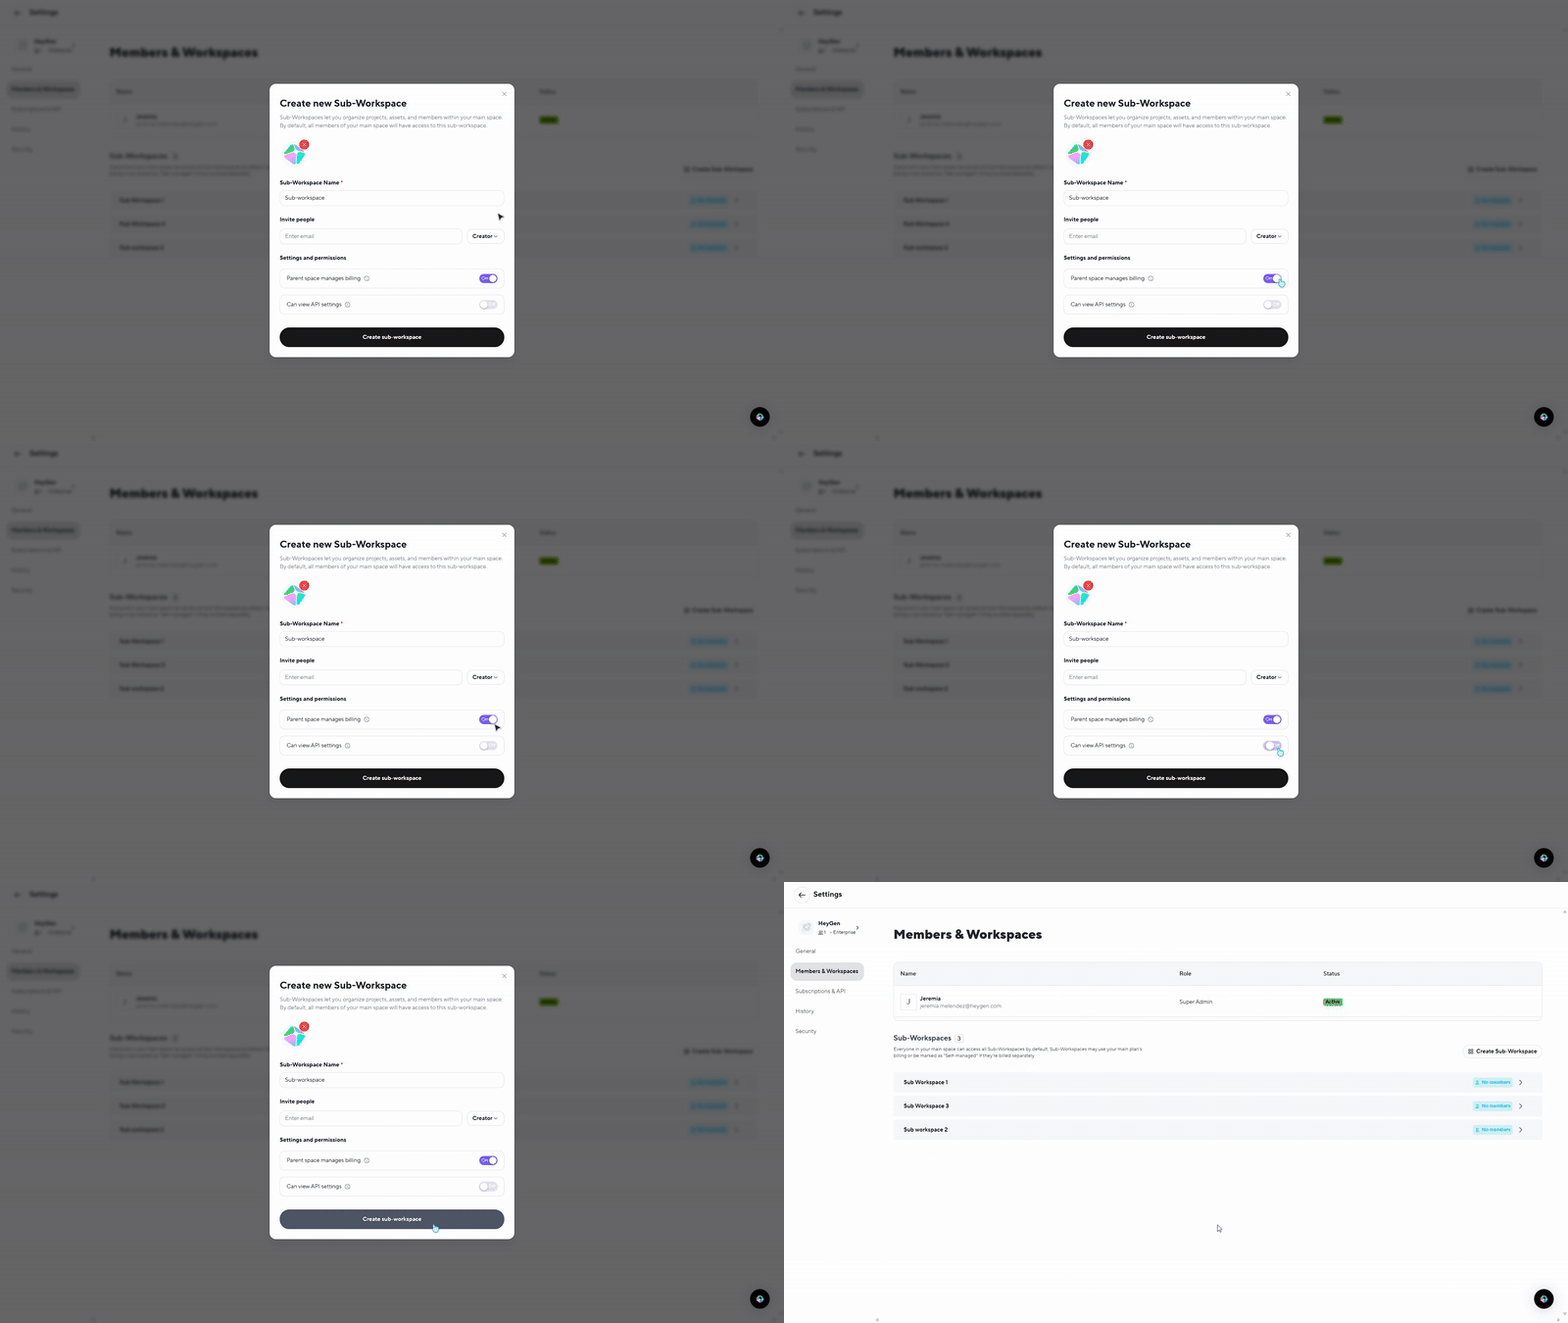
In "Settings and Permissions," you can configure key options:
- Parent Space Manages Billing: When toggled on, the Sub-Workspaces manages its own subscription and does not inherit or use up any quota or video avatar slots of the parent space. Toggling this on also allows the Sub-Workspace owner to create additional Sub-Workspaces.
- Can view API settings: When toggled on, the Sub-Workspaces will be able to access API settings and use separate API keys. Each Sub-Workspace has its own API key. The ‘Usage History’ tab on the ‘API Settings’ page for each Sub-Workspace will only show usage for the API key for that Sub-Workspace. This allows the parent space to easily track API usage per Sub-Workspace.
Once finished, click "Create Sub-workspace" to finalize setup.
Managing Members and Permissions
Once a Sub-Workspace is created, all available seats in the parent workspace are automatically allocated.
When inviting members, seats are assigned based on availability. If the seat limit is reached, you’ll need to remove an existing member before adding a new one.
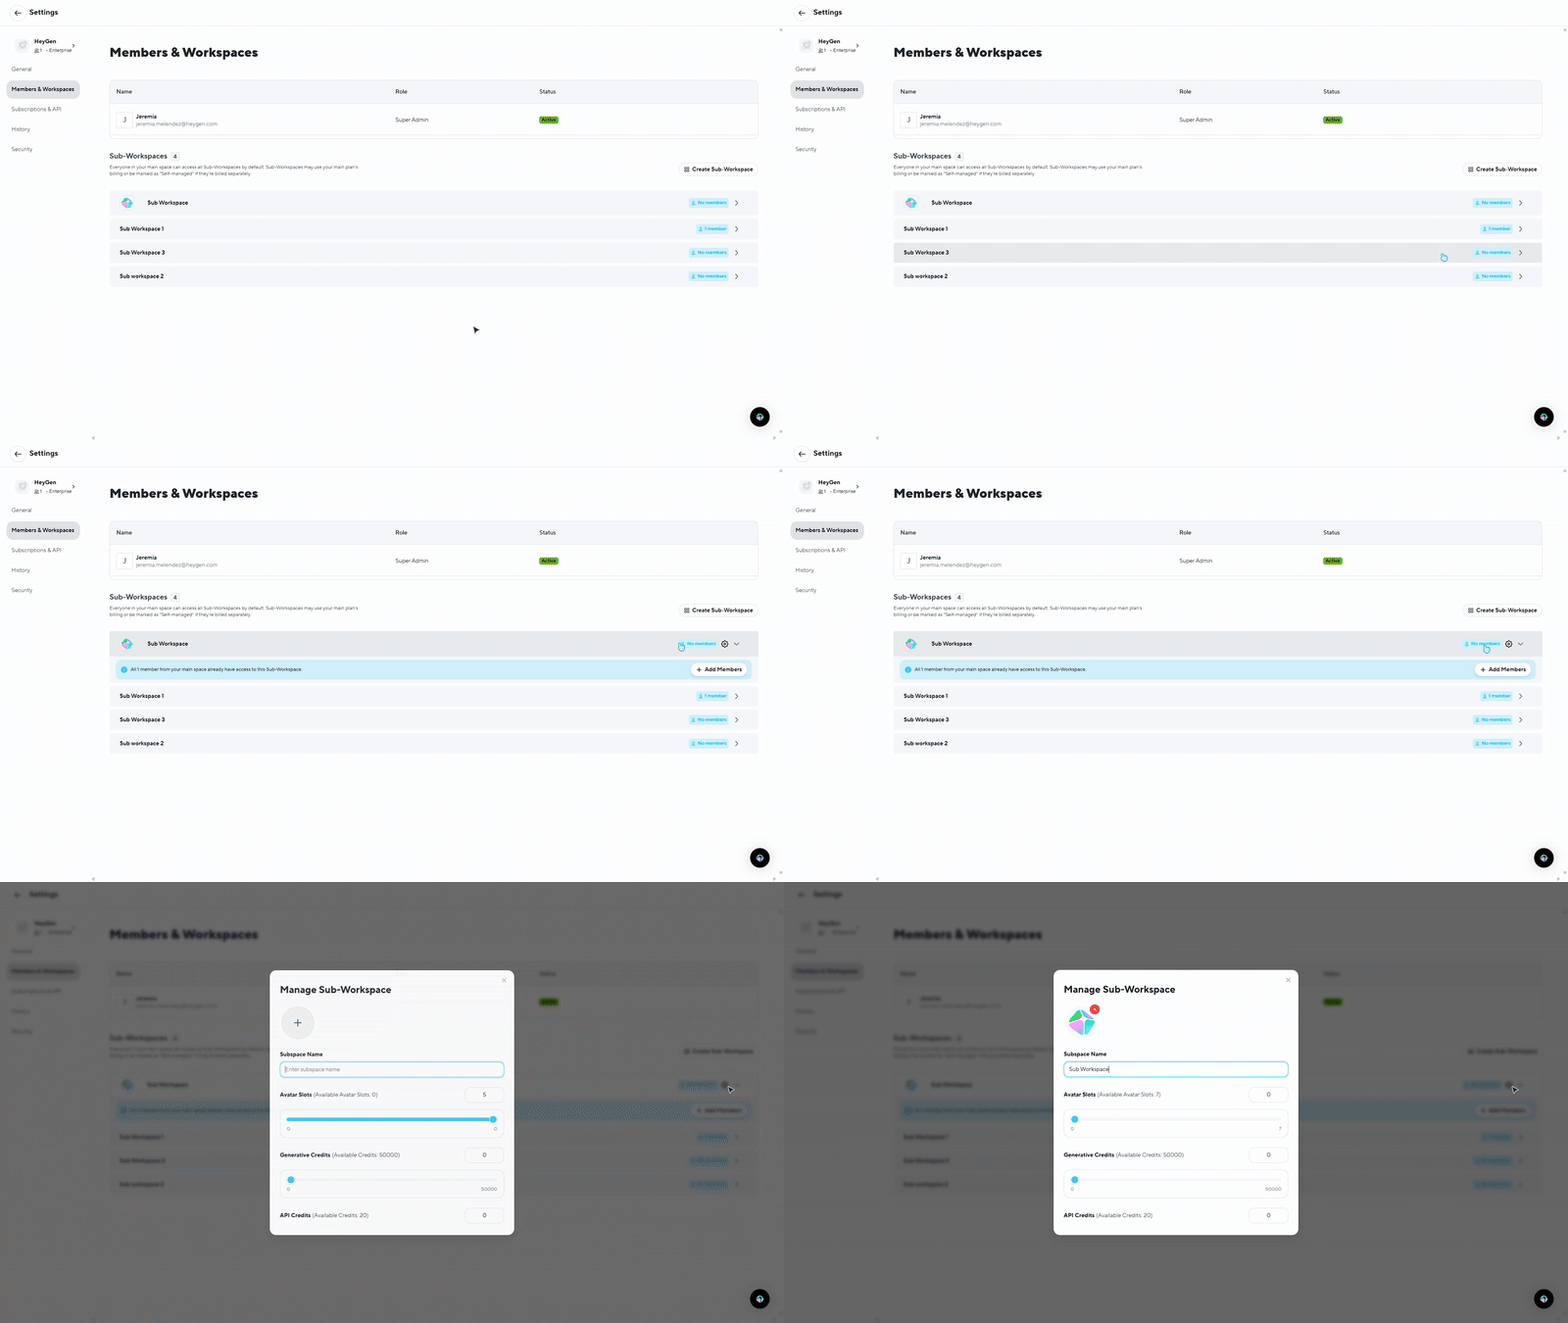
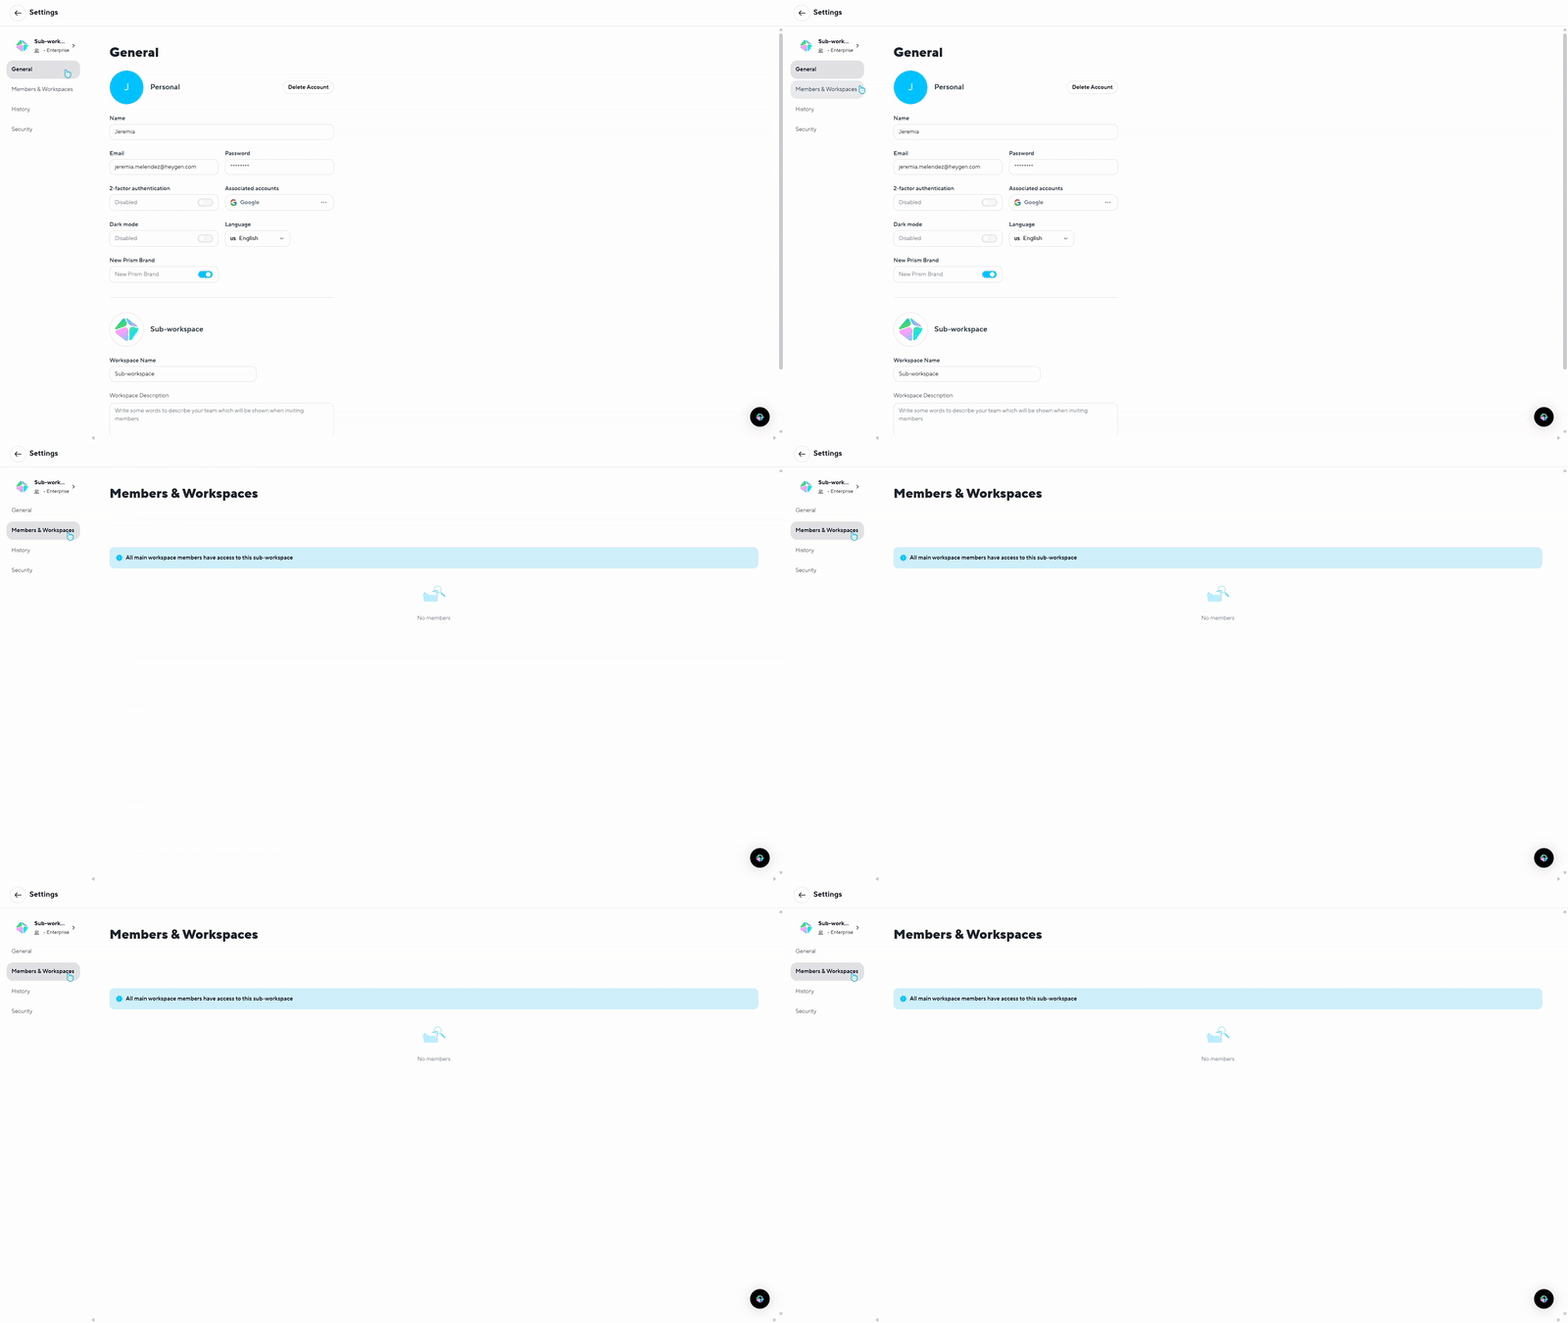
In the Members & Workspaces tab, you can manage permissions and workspace capacity:
Avatar Slots: Assign avatar creation capacity to each Sub-Workspace, allowing teams to create and manage avatars independently while keeping usage organized under the parent workspace.
Member Roles: Adjust user roles and access levels to ensure proper collaboration and security.
Workspace Management: Use the gear (⚙️) icon beside any Sub-Workspace to modify its settings, membership, or allocated resources.
Managing Generative and API Credits
We’re excited to announce that one of our most highly requested features is now available — the ability to allocate Generative and API Credits directly to Sub-Workspaces.
This gives admins more control, flexibility, and visibility when managing resources across teams.
Generative Credits
Generative Credits are used for AI-driven features such as Avatar 4.0, image generation, video creation, and translation.
To add or adjust credits:
Go to Settings → Members & Workspaces.
Click on the desired Sub-Workspace.
Select the gear (⚙️) icon.
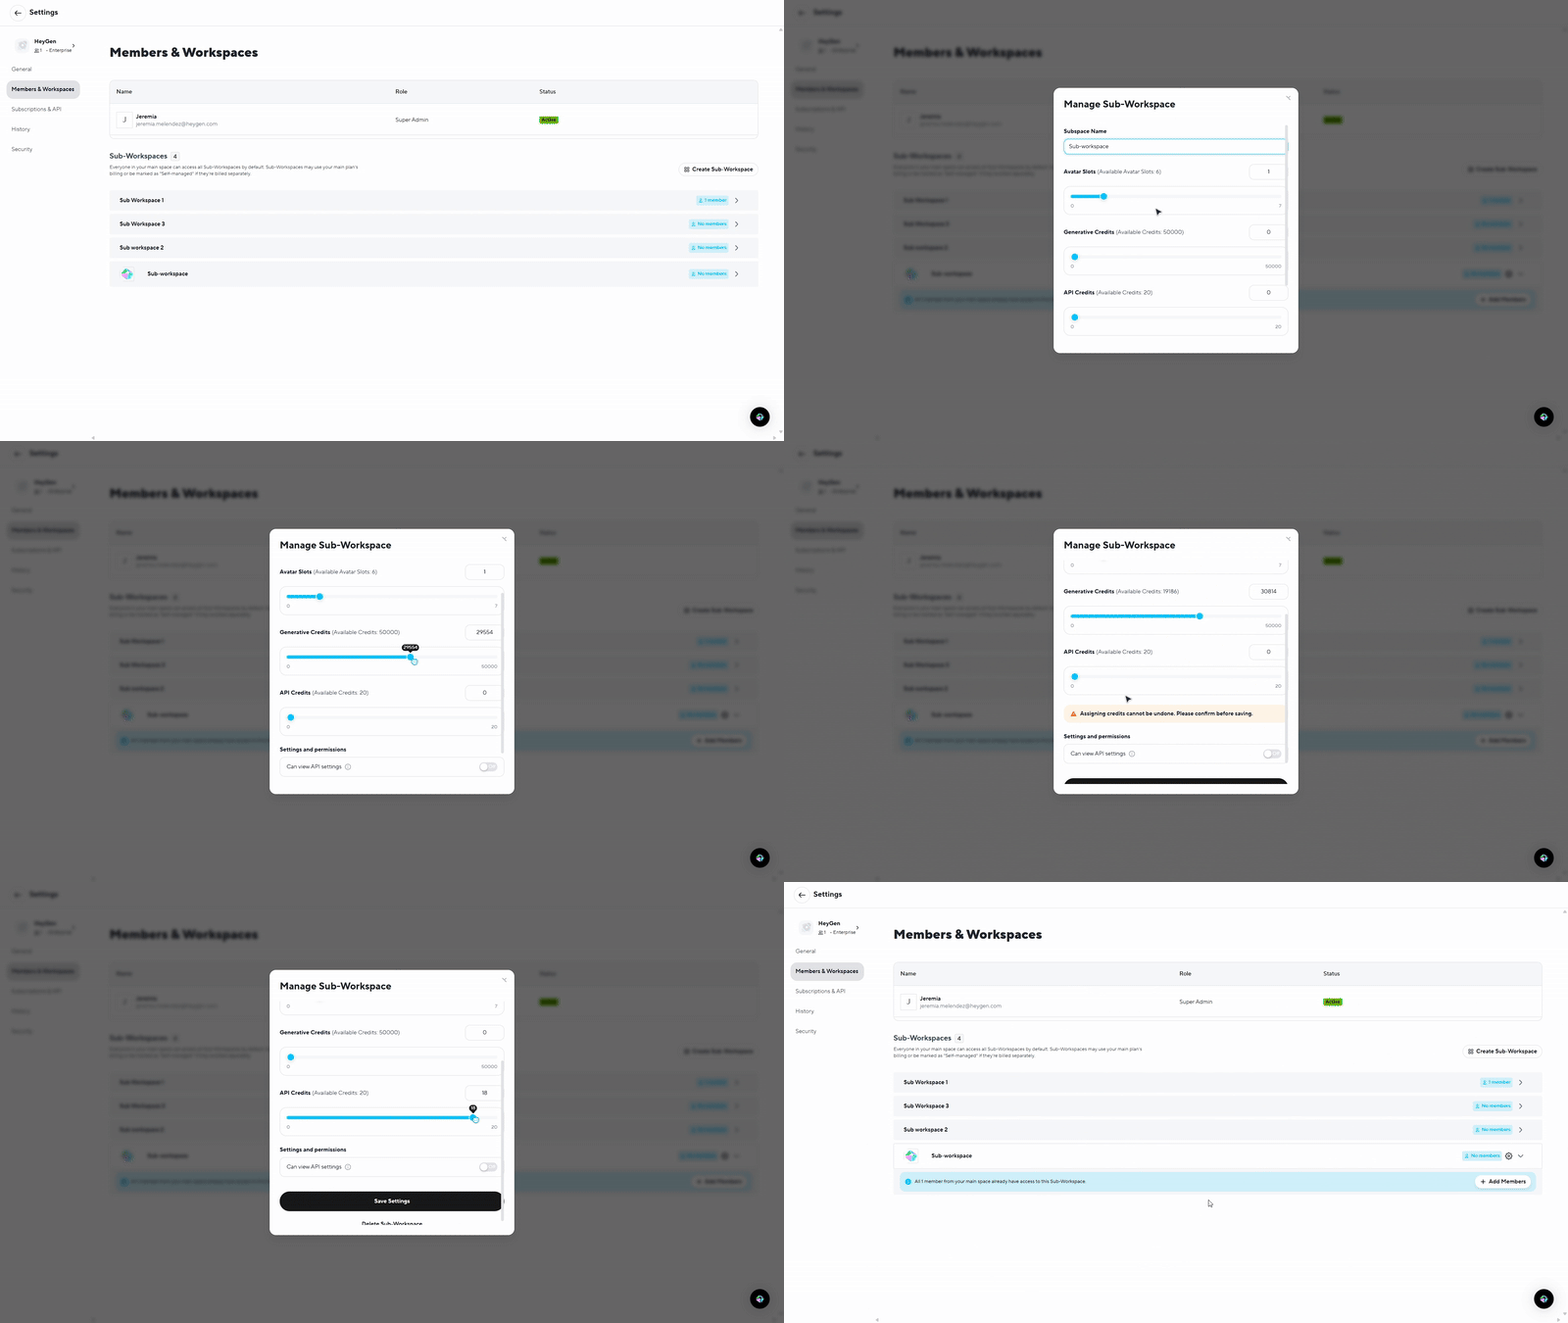
Enter the number of Generative Credits to allocate.
Click Save Settings.
This ensures each team has the right balance of creative capacity while maintaining control over total credit usage.
API Credits
API Credits power automations, integrations, and other API-based processes. To allocate or modify API credits:
Navigate to Settings → Members & Workspaces.
Select the Sub-Workspace and click the gear (⚙️) icon.
Enter the number of API Credits to assign.
Click Save Settings.
Admins can use this feature to track spend, monitor usage, and scale automation efficiently across teams.
---
When logged into a typical Sub-Workspace, subscription settings are not visible.
Moving Avatars to Sub-Workspaces
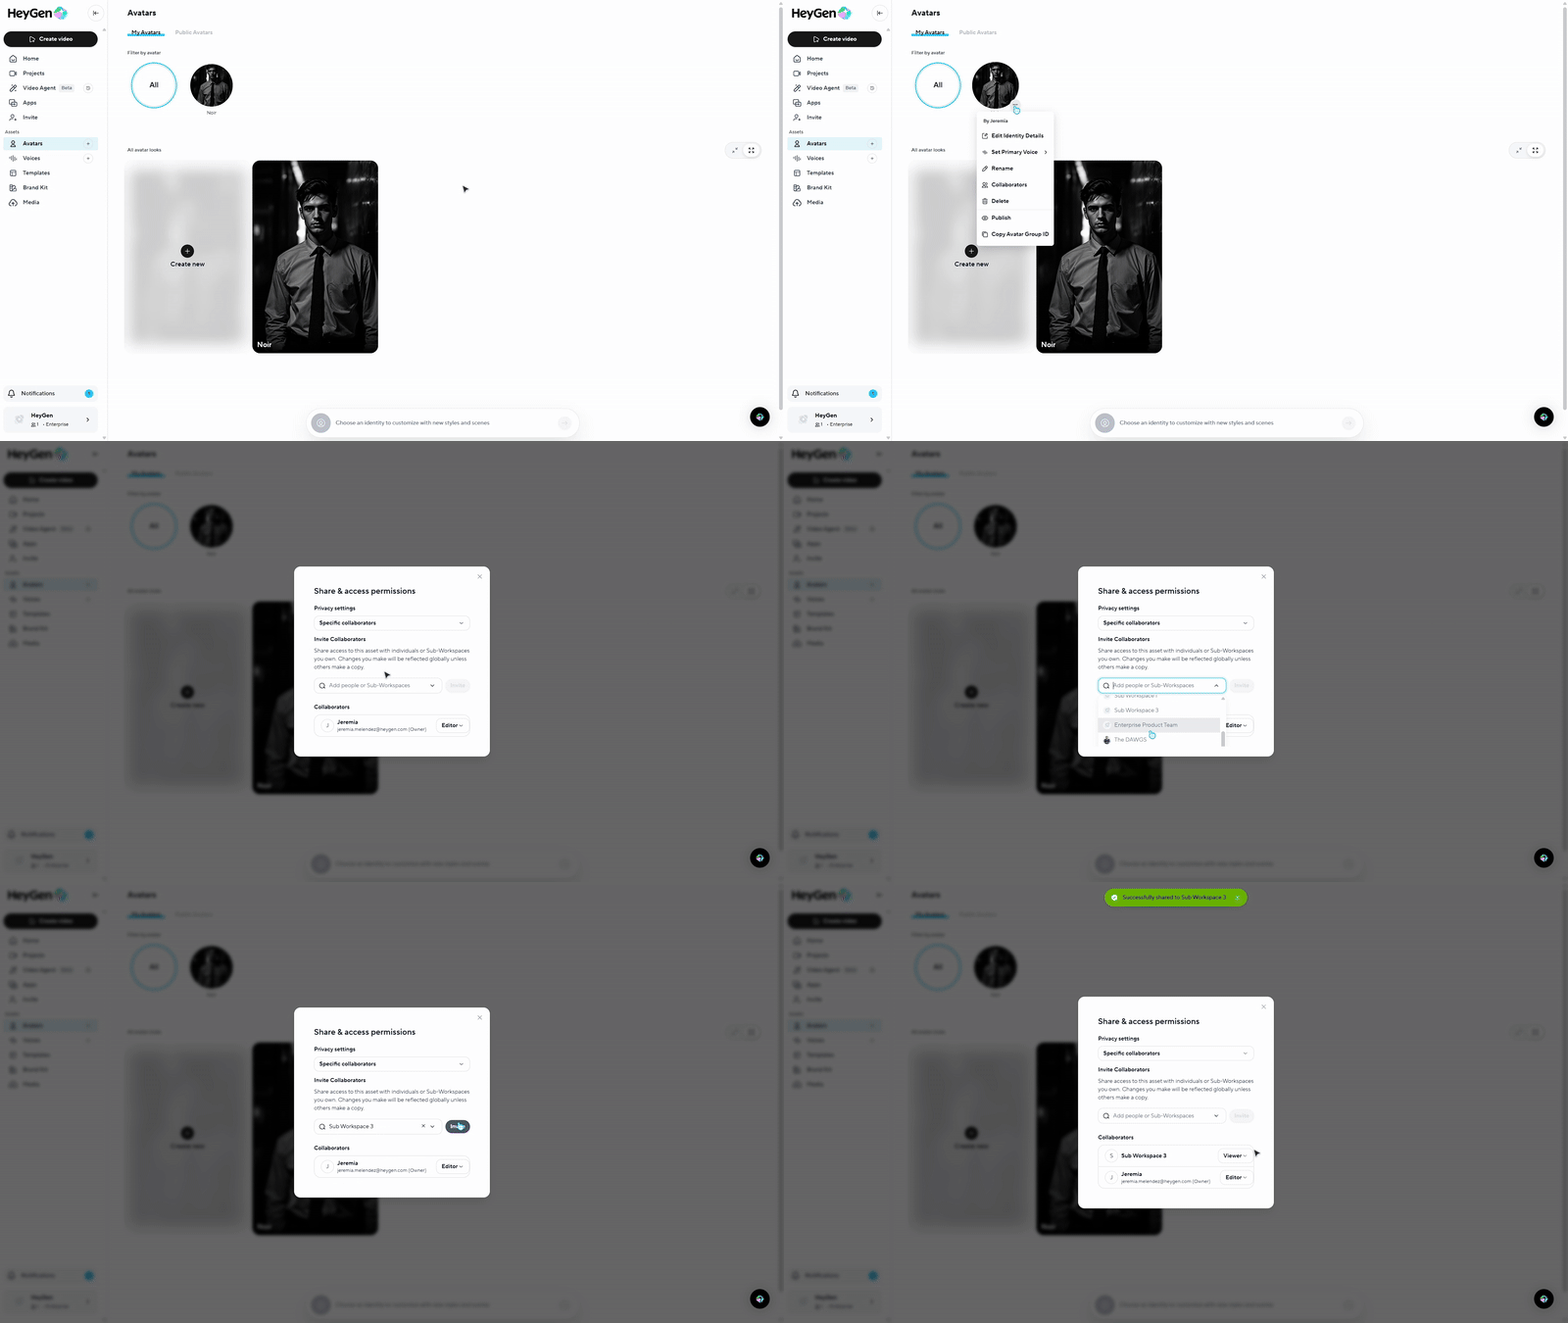
Parent spaces can move avatars from their space to connected Sub-Workspaces. To do this, navigate to the "Avatars" tab in the left-hand navigation.
Next, click the three dots in the bottom right corner of the avatar you'd like to move, make sure you select the three dots on the circular avatar at the top, then select "Collaborators" and choose the desired Sub-Workspace.
Sharing Brand Kits and Templates Across Sub-Workspaces
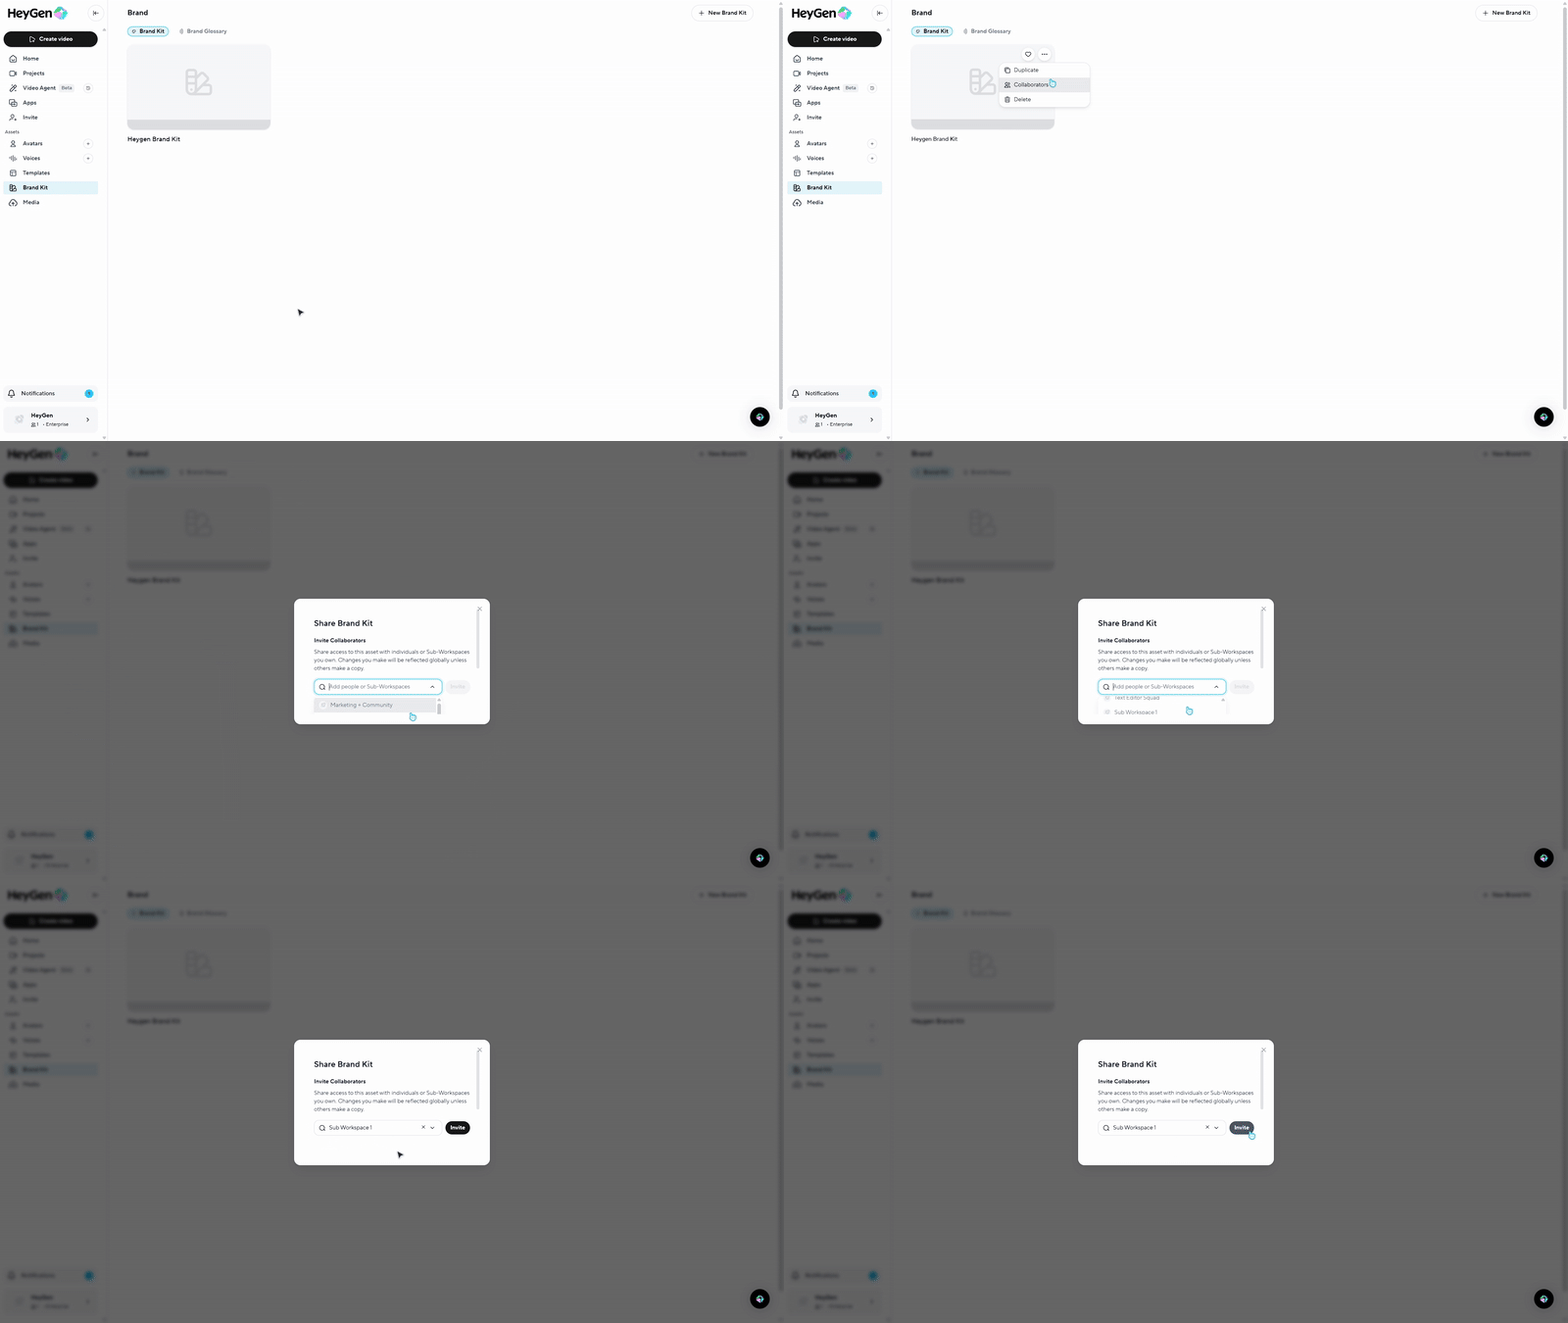
Enterprise spaces can share brand kits and templates with their connected Sub-Workspaces. To do this, navigate to the left-hand menu and select either 'Brand Kits' or 'Templates.'
Next, click the three dots in the top right corner of the brand kit or template you'd like to share, select "Collaborators," you can choose to share with specific members on your team, or a Sub-Workspace.
Once shared, the recipient Sub-Workspace will have view-only access to the asset. They can create and edit a copy, but any changes made by the original sharer will not be reflected in their copy.
Additionally, private avatars and voices will be replaced with public options from the platform when using shared templates.
Adding a Custom Voice to a Sub-Workspace
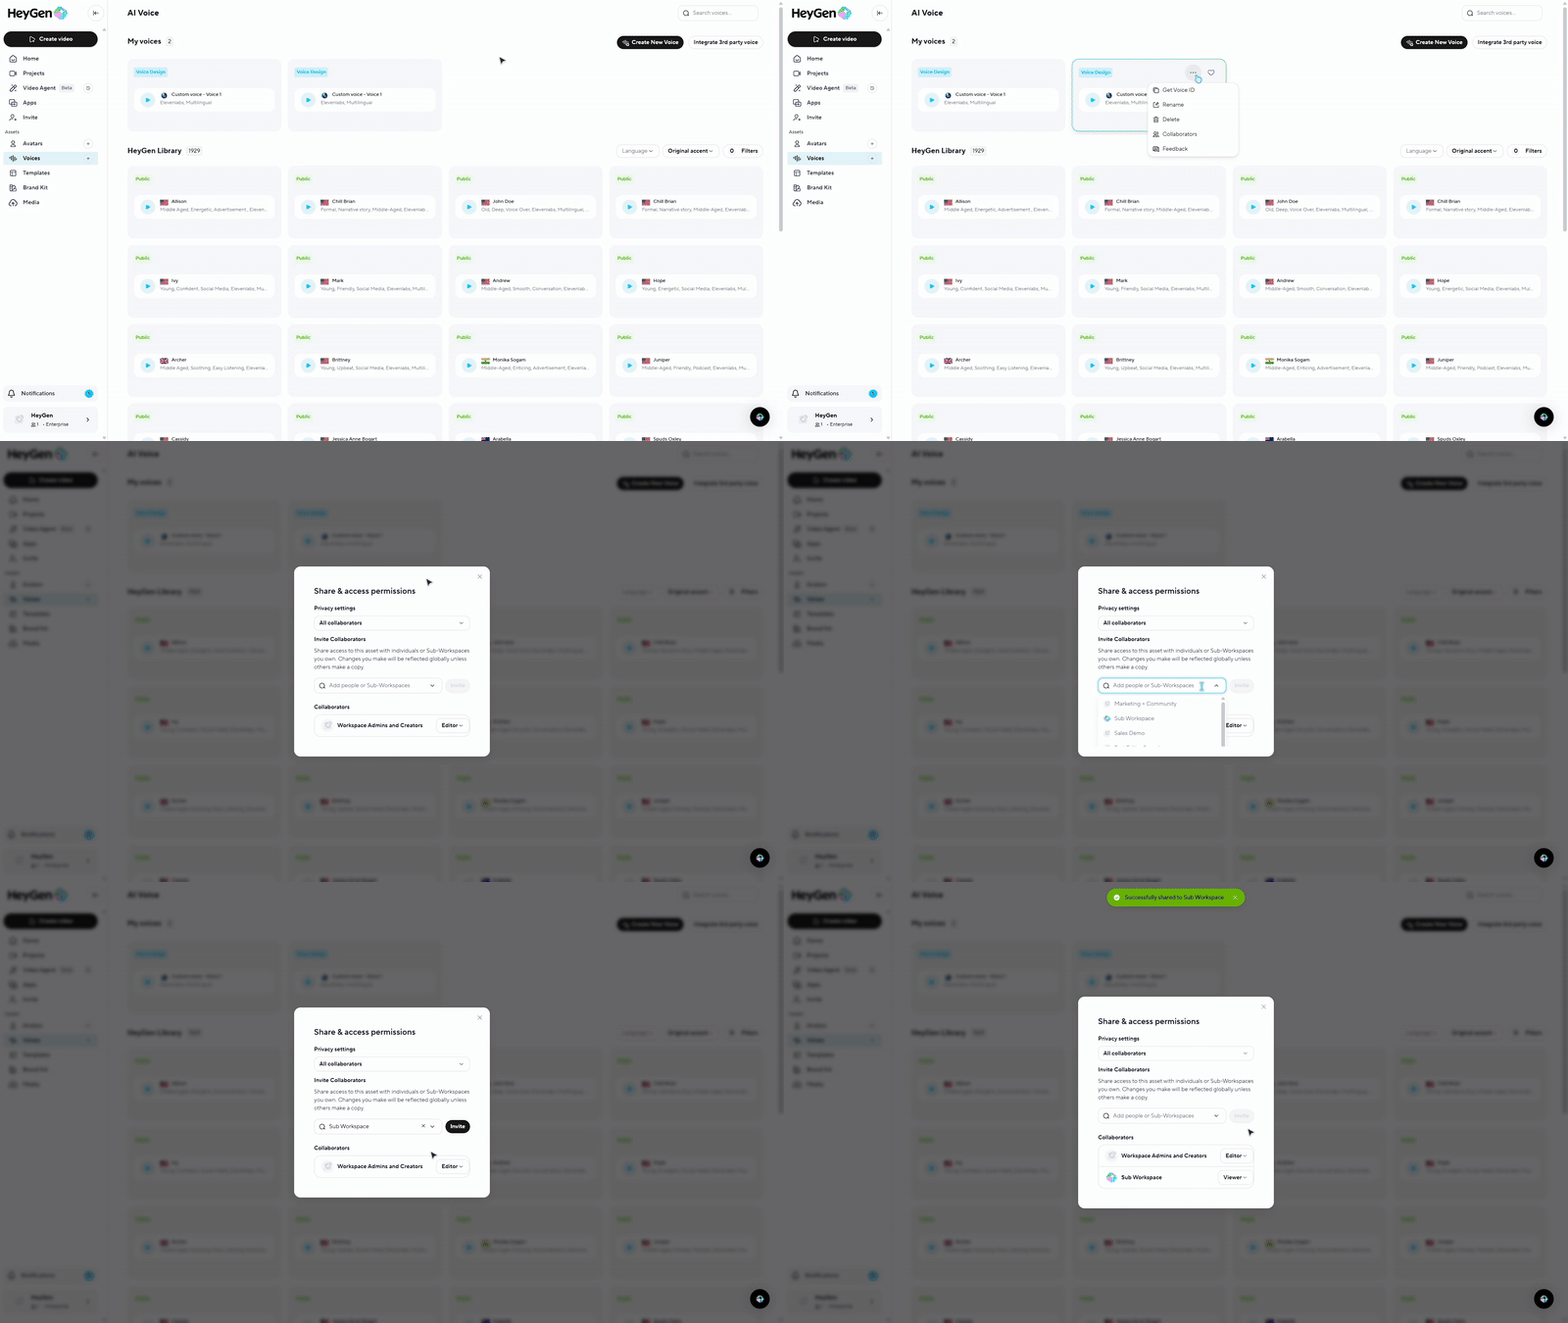
Parent workspaces can now share or move custom voices from their main workspace to any connected Sub-Workspace.
This allows teams within Sub-Workspaces to access approved brand voices for consistent narration across projects.
To move a custom voice:
Navigate to the Voices tab in the left-hand navigation.
Locate the custom voice you’d like to move.
Click the three dots (⋯) in the bottom-right corner of the voice card.
Select Collaborators.
Choose the Sub-Workspace where you want to make the voice available.
Once shared, the custom voice will appear within the selected Sub-Workspace, allowing that team to use it in video generation just like the parent workspace.
Recap
And that’s it! With Sub-Workspaces, you can easily manage teams and projects within HeyGen while maintaining control over access and billing.
What we covered:
- How to navigate and create Sub-Workspaces
- Adding and managing members
- Managing Members, Permissions, and Credits
- Moving avatars to Sub-Workspaces
- Sharing Brand Kits and Templates Across Sub-Workspaces
Looking forward to seeing how you use Sub-Workspaces to streamline your workflow!
