Editing
October 8, 2025 · Last updated on March 3, 2026
How to use HeyGen’s Interactivity for branching and clickable videos
# Editing
# Interactivity
Add clickable elements and branching logic directly into your videos!
With HeyGen’s Interactivity feature, you can now add clickable elements and branching logic directly into their videos, no coding, no extra tools required, built specifically for Learning & Development on Enterprise plans. Whether you’re linking to external resources or building choose-your-own-adventure pathways, interactive video makes it easier to engage learners and guide them through personalized experiences.
What’s covered in this guide
- What is Interactivity in HeyGen?
- The available interactivity types
- How to use branching
- How to use action buttons
- How to use quizzes
- Wait for Click
- Previewing and managing interactive videos
- Recap
What is Interactivity in HeyGen?
Interactivity lets you add clickable elements like buttons, shapes, and text that can link out to external content or branch viewers to different scenes within your video.
This is ideal for training scenarios where viewers need to explore content at their own pace, confirm they’ve reviewed specific information, or choose what to learn next.
As an L&D user, you have access to interactivity options directly within the editor, allowing you to build decision points, assessments, and navigation paths inside your video.
Interactivity is added per scene and managed through the right-side panel. Once applied, interactive scenes are clearly marked in the timeline, making it easy to track where learner input is required.
Add interactive elements to your scenes
To get started, open your project and navigate to the right-side panel. Select Interactivity to view the available interactivity types. From here, you can choose between branching, action buttons, and quizzes, depending on the experience you want to create.
Each interactivity type is configured using two tabs:
- Content, where you enter and edit questions, text, and response options
- Appearance, where you customize fonts, colors, and the overall visual styling of the interaction
These tabs work consistently across all interactivity types, making it easy to switch between branching, action buttons, and quizzes while maintaining a familiar setup flow.
Interactivity types
Branching
Branching allows you to send viewers to different scenes based on the option they select. This is ideal for scenario-based learning, role-play simulations, and decision-driven training.
When you add a branching interaction, the editor automatically switches to branch view. This view is only visible when branching is used and is available to enterprise customers within the L&D solution.
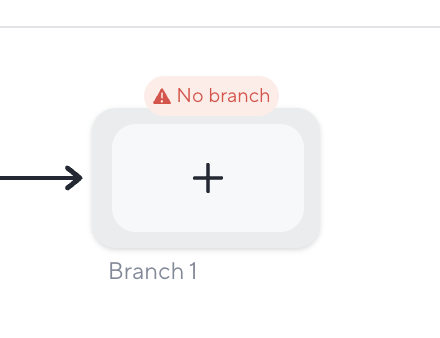
When you enter branch view, you can build and manage the branching experience directly within the timeline itself. If you decide you need an additional option, you can add it in directly in the branch view, making it easy to expand the scenario as you think through different learner paths.
As you design each branch, you can create new scenes directly within that branch and edit them just like any other scene in your project.
If you already have a scene that you want to reuse, you don’t need to recreate it. You can choose to jump to an existing scene instead, allowing multiple options or branches to converge at the same point in the video.
When a jump is in place, a visual indicator appears so it’s clear that the scene is being reused rather than newly created.
Branch view also makes it easy to reorganize your content as your video evolves. You can drag and drop scenes between different branches, which helps ensure that content is never locked into a single path or underutilized.
If a scene or branch is no longer relevant, you can simply delete it, and the structure updates immediately. Throughout this process, the visual layout makes it clear where each option leads, so you can understand the full flow of the video at a glance without relying on repeated previews.
To help prevent issues, HeyGen flags potential problems directly in the editor. Scenes that may be skipped due to branching are marked with a red indicator, and additional alerts appear if a scene has no script or if a branch has no connected scene.
You can switch between branch view and the linear timeline at any time, depending on your editing preference.
Action buttons
Action buttons prompt viewers to take a specific action during playback. You can use them to send learners to an external link or jump to another scene within the video.
To use an action button, select Action button from the interactivity menu, then choose the action type:
- URL, where you paste an external link
- Jump to scene, where you select an existing scene in the video
Quizzes
Quizzes allow you to ask learners questions and provide immediate feedback based on their answers. They are useful for knowledge checks, reinforcement, and assessments throughout a video.
To use a quiz, select Quiz from the interactivity menu and update the question text in the Content tab. You can add or remove answer options as needed and mark which answers are correct.
Quizzes support both single correct answers and multiple correct answers. Once answered, the learner receives clear feedback indicating whether their selection is correct or not.
Control the experience with “Wait for Click”
One of the most powerful parts of this feature is Wait for click, which is turned on by default. When it’s active, the video will pause and wait for the viewer to click before continuing. This is especially useful for confirming comprehension or pacing content in a self-guided learning flow.
You can also turn Wait for Click off if you want the video to continue playing without requiring viewer interaction. Just remember: if a branching action is involved, Wait for Click must remain on so that learners don’t skip the decision point.
If your branching sends users to Scene 3, and you later add a new scene before it, that original link will still point to what is now Scene 4. This keeps your logic consistent, but be mindful scenes skipped due to branching will be flagged so you can review them.
Preview and finalize your interactive video
Interactive elements won’t work directly in the canvas, but you can see them in action by clicking Preview. Here, you’ll be able to test each clickable element, see how branches flow, and confirm whether Wait for Click is doing its job.
Blue icons in your timeline also make it easy to identify which scenes contain interactivity.

Once everything looks good, click Generate. Your interactive video is now ready to use and share.
Recap
In this tutorial, you learned how to:
- What is Interactivity in HeyGen?
- The available interactivity types
- How to use branching
- How to use action buttons
- How to use quizzes
- Wait for Click
- Preview and finalize your interactive video
Interactive video unlocks new possibilities for learner engagement, whether you’re linking out to resources or building choose-your-path journeys. We can’t wait to see how you use it!
Comments (8)
Popular

Dive in