Tutorial
February 5, 2025 · Last updated on April 23, 2025
Step-by-step guide: create engaging e-learning courses

# Tutorial
Ready to create engaging e-learning, lectures, and tutorials?

Whether you're creating lectures, tutorials, or motivational messages, HeyGen makes it simple to produce professional, engaging videos that captivate global audiences and deliver lasting impact. Effortlessly translate and localize your videos into over 170 languages and dialects with HeyGen’s AI-powered tools. Deliver meaningful content to learners anywhere in the world with accurate voiceovers and synchronized lip movements. Ready to get started? Let’s dive in!
Step 1: Plan your course or video content
Start with a clear outline. Define your objectives and what you want learners to achieve. Next, break it down and create a structured flow with modules, lessons or key sections. Then, write your script!
Visit our write and use video scripts in HeyGen for engaging videos resource and don’t miss the section on how to generate a script with AI.
Not sure where to start? Here’s a tried and true structure you can adapt to your needs:
1. Introduction scene: setting the stage
- Purpose: Capture attention, introduce the topic, and set expectations
Visuals:
- A lifelike avatar with a welcoming demeanor
- Brand logo, course title, and tagline prominently displayed
- A visually appealing background, such as a virtual classroom or office
Tips:
- Include a hook (e.g., a surprising fact, statistic, or question)
- Briefly outline what the viewer will learn
2. Explainer scene: core content delivery
- Purpose: Present the main concepts or lessons clearly and concisely
Visuals:
- Avatar delivering the lecture or explanation
- Text overlays for definitions, key points, or steps
- Supporting graphics (charts, diagrams, or infographics)
- Split-screen with avatar on one side and visuals on the other
Tips:
- Use bullet points or visual cues to emphasize key takeaways
- Keep sentences short and focused
3. Interactive scene: engaging learners
- Purpose: Reinforce learning through interaction
Visuals:
- Avatar asking questions or prompting the viewer to pause and reflect
- On-screen quizzes or polls
- Animations or clickable hotspots for interactive learning modules
Tips:
- Incorporate prompts like “What do you think?” or “Pause the video and try this.”
- Offer feedback on answers to encourage engagement.
4. Demonstration scene: showing practical application
- Purpose: Provide real-world examples or walk through processes step-by-step
Visuals:
- Screen recordings for software tutorials
- Avatar narrating while pointing to steps or actions
- Process flows, animated diagrams, or simulations
Tips:
- Slow down for complex steps and highlight crucial actions
- Include captions or call-outs for clarity
5. Storytelling scene: building emotional connection
- Purpose: Connect the content to relatable scenarios or case studies
Visuals:
- Avatar narrating a story or anecdote
- Animated characters or illustrative visuals to depict the story
- Backgrounds reflecting the setting of the story (e.g., office, outdoor scene)
Tips:
- Keep stories concise and relevant to the lesson
- Use a conversational tone to maintain interest
6. Recap scene: reinforcing key takeaways
- Purpose: Summarize the lesson and highlight important points
Visuals:
- Bullet-point list of the key takeaways
- Avatar delivering a concise recap
- Minimalist, clean backgrounds to keep the focus on the content
Tips:
- Use transitions or animations to sequentially reveal points
- Reinforce with phrases like, “Here’s what we covered today”
7. Practice scene: testing knowledge
- Purpose: Encourage learners to apply what they’ve learned
Visuals:
- Interactive elements like multiple-choice questions or fill-in-the-blank exercises
- Scenarios or problem-solving tasks presented visually
- Avatar providing instructions and feedback
Tips:
- Design scenarios that mimic real-world challenges
- Offer hints or explanations for incorrect answers
8. Call-to-action scene: next steps
- Purpose: Guide viewers on what to do next
Visuals:
- Avatar encouraging the next action (e.g., “Take the next module,” “Download resources,” or “Share your thoughts in the discussion forum”)
- Button graphics or QR codes linking to additional materials
Tips:
- Use motivational language to inspire action
- Keep the instructions clear and specific
9. Outro scene: closing and acknowledgment
- Purpose: End the video on a positive and memorable note
Visuals:
- Avatar thanking the audience for their time
- Course logo and contact information
- Invitation to leave feedback, share, or explore more content
Tips:
- Add background music for a polished touch
- Include an engaging closing statement or motivational quote
Bonus scene ideas
- Behind-the-Scenes View: Show how tools or systems work, particularly for technical tutorials
- Scenario-Based Scene: Introduce “what-if” situations to encourage critical thinking
Step 2: Choose or create your avatar
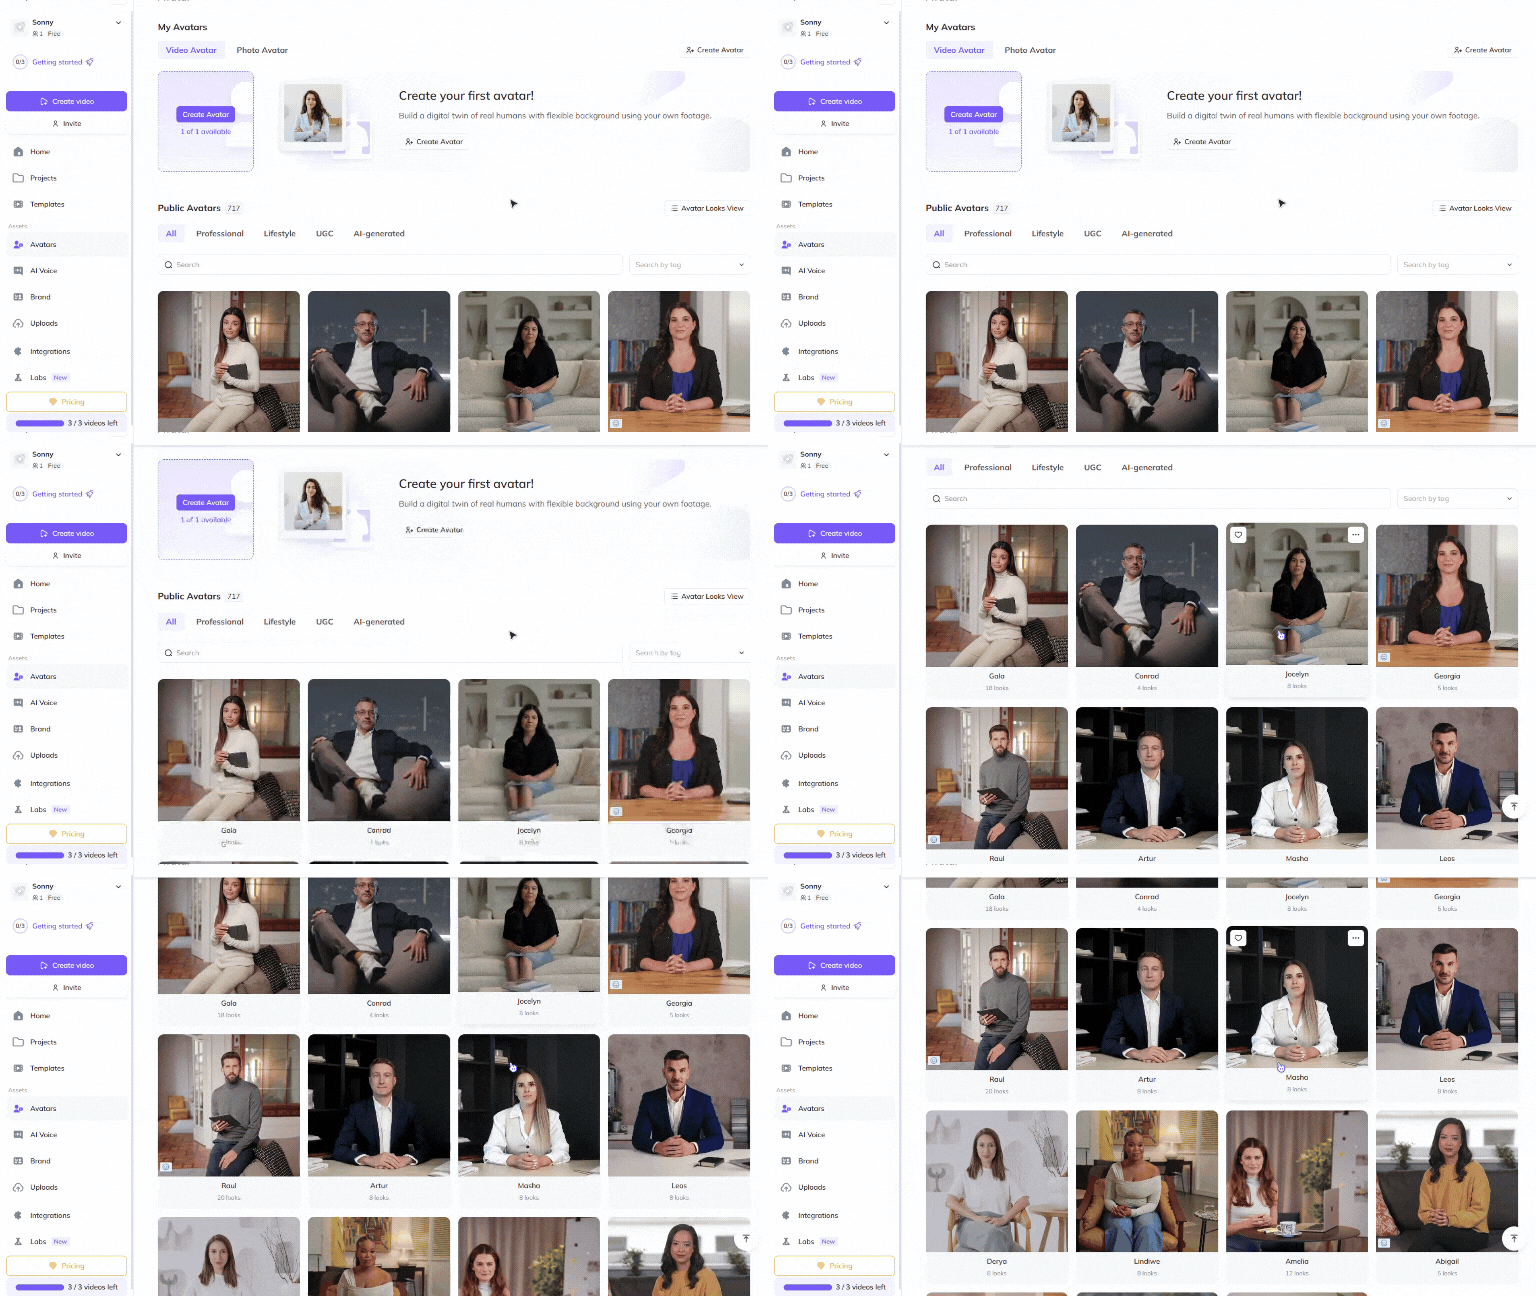
HeyGen offers a wide range of avatars for every occasion and options for creating custom avatars to bring your videos to life!

See this resource for step-by-step instructions on how to choose a Public Avatar from HeyGen’s extensive library of avatars with 700+ voices compatible with 170+ languages and dialects. Each Public Avatar also comes with multiple Looks, which are varying outfits, poses or backgrounds.
Want even more personalization? See our video avatar: create your digital twin guide to make your very own avatar using photos and videos from your smartphone. For the best output, see this best Practices for creating AI avatars and voices.
Want something completely custom or out-of-the box? Try generating an avatar from text where your imagination is the only limit. Whether hyper-realistic, in an animation style of your choice, or set fully in a fictional world, generate the perfect avatar for your needs in unlimited outfits and surroundings. See our guide on how to change your avatars’ outfits and surroundings for further customization, and if you’re new to prompting, see our prompting best practices guide.
Customize avatars with outfits and backgrounds to enhance brand consistency.
Step 3: Design your scenes
Visual storytelling is crucial for creating the most engaging learning experience, and HeyGen makes it easy to design visually appealing scenes. To get started, see this step-by-step guide on how to create and edit videos in HeyGen.
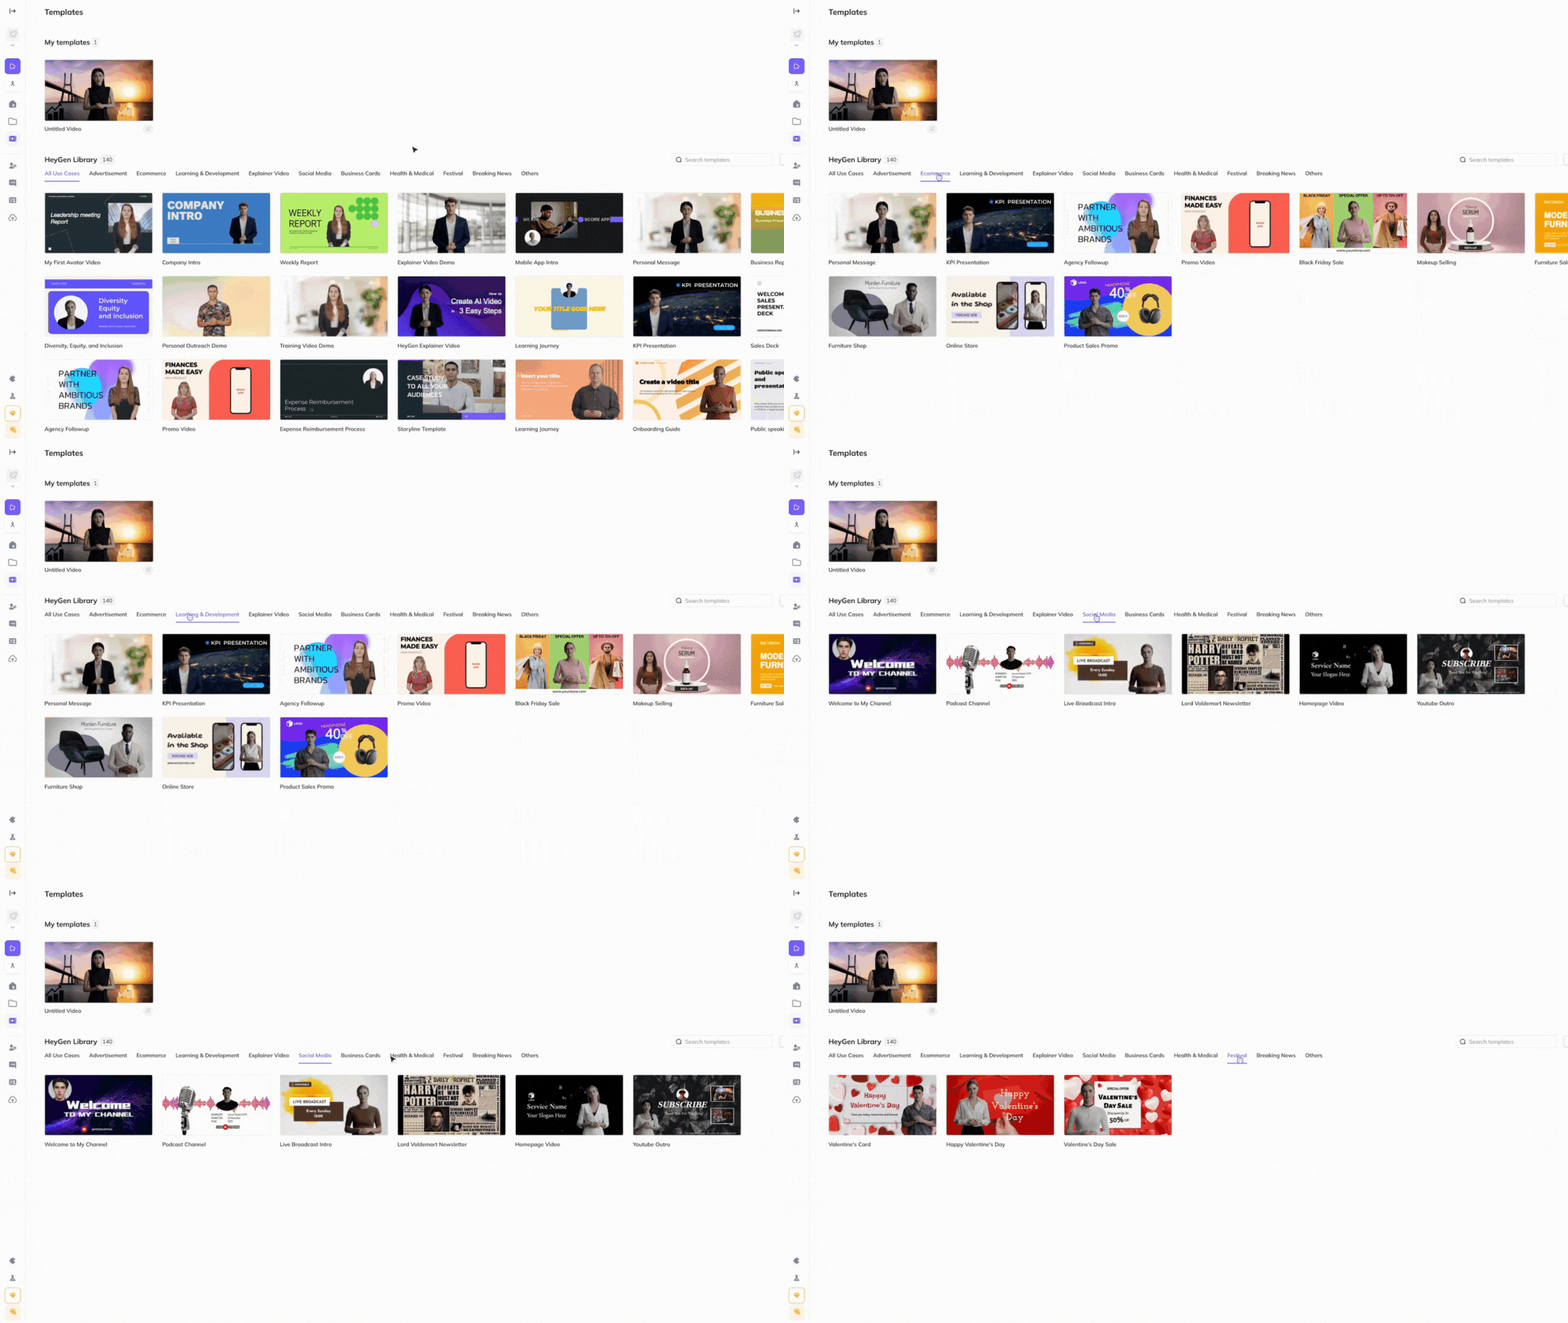
Browse HeyGen’s extensive library of professionally designed templates or create your own to match your brand’s unique look and feel.

Upload assets such as product images, videos, animations, music, or screen recordings that illustrate your product’s key features.
Choose virtual environments that reflect your topic (e.g., a classroom, office, or vibrant backdrop). Consider including your logo, brand colors, or animations for a polished, professional look.
Starting from zero? Here are a few types of common scenes you might see in education and training videos:
Slide type | Purpose | Design elements | Layout tips |
Title / Opening | Introduce video, topic, branding | Large, bold title with course nameSpace for subtitles or taglineLogo placement | Center-align key text and use clean, minimalist visuals for a professional first impression |
Content Delivery | Present core material in an engaging way | Side-by-side design: avatar on one side, bullet points or visuals on the otherHeader for section/topic titleSpace for charts, graphs, imagesColor coding or icons for different types of content | Leave ample blank space to avoid clutter and ensure readability |
Interactive Slide | Encourage participation or reflection | Central question or prompt areaIconography that represents interaction (lightbulbs for ideas, arrows for progression)Minimal distractions to focus attention on interactive elements | Use clear divisions between the question and any supporting information. |
Demonstration or Tutorial | Showcase step-by-step instructions or processes | Numbered list area for steps Space for screenshots, diagrams Icons or arrows to guide the viewer’s eye through the process Footer space for notes or tips | Align steps vertically or horizontally, depending on the content’s flow |
Storytelling or Scenario | Present case studies or real-world examples | Background visuals that set the scene (office, outdoor setting)Space for captions or text overlaysArea for a key takeaway or moral of the story | |
Recap Slide | Summarize key takeaways | A list or grid for bullet points or key messagesLarge, bold section headersIconography to visually represent ideas (e.g., checklist for goals achieved) | Arrange in a hierarchy with the most important points at the top |
Call-to-Action | Guide learners to the next step | A bold central message (e.g., “start your next module)Motivational imagery (hands clapping, upward arrows) | Keep it simple and action-oriented with minimal distractions |
Closing | End the video with a lasting impression | Space for a thank you message or motivational closing statementBranding elements (logo, tagline)Invitation to action (”enroll in the next course”) | Use fade-out effects or subtle animations for smooth transitions |
Step 4: Edit and refine
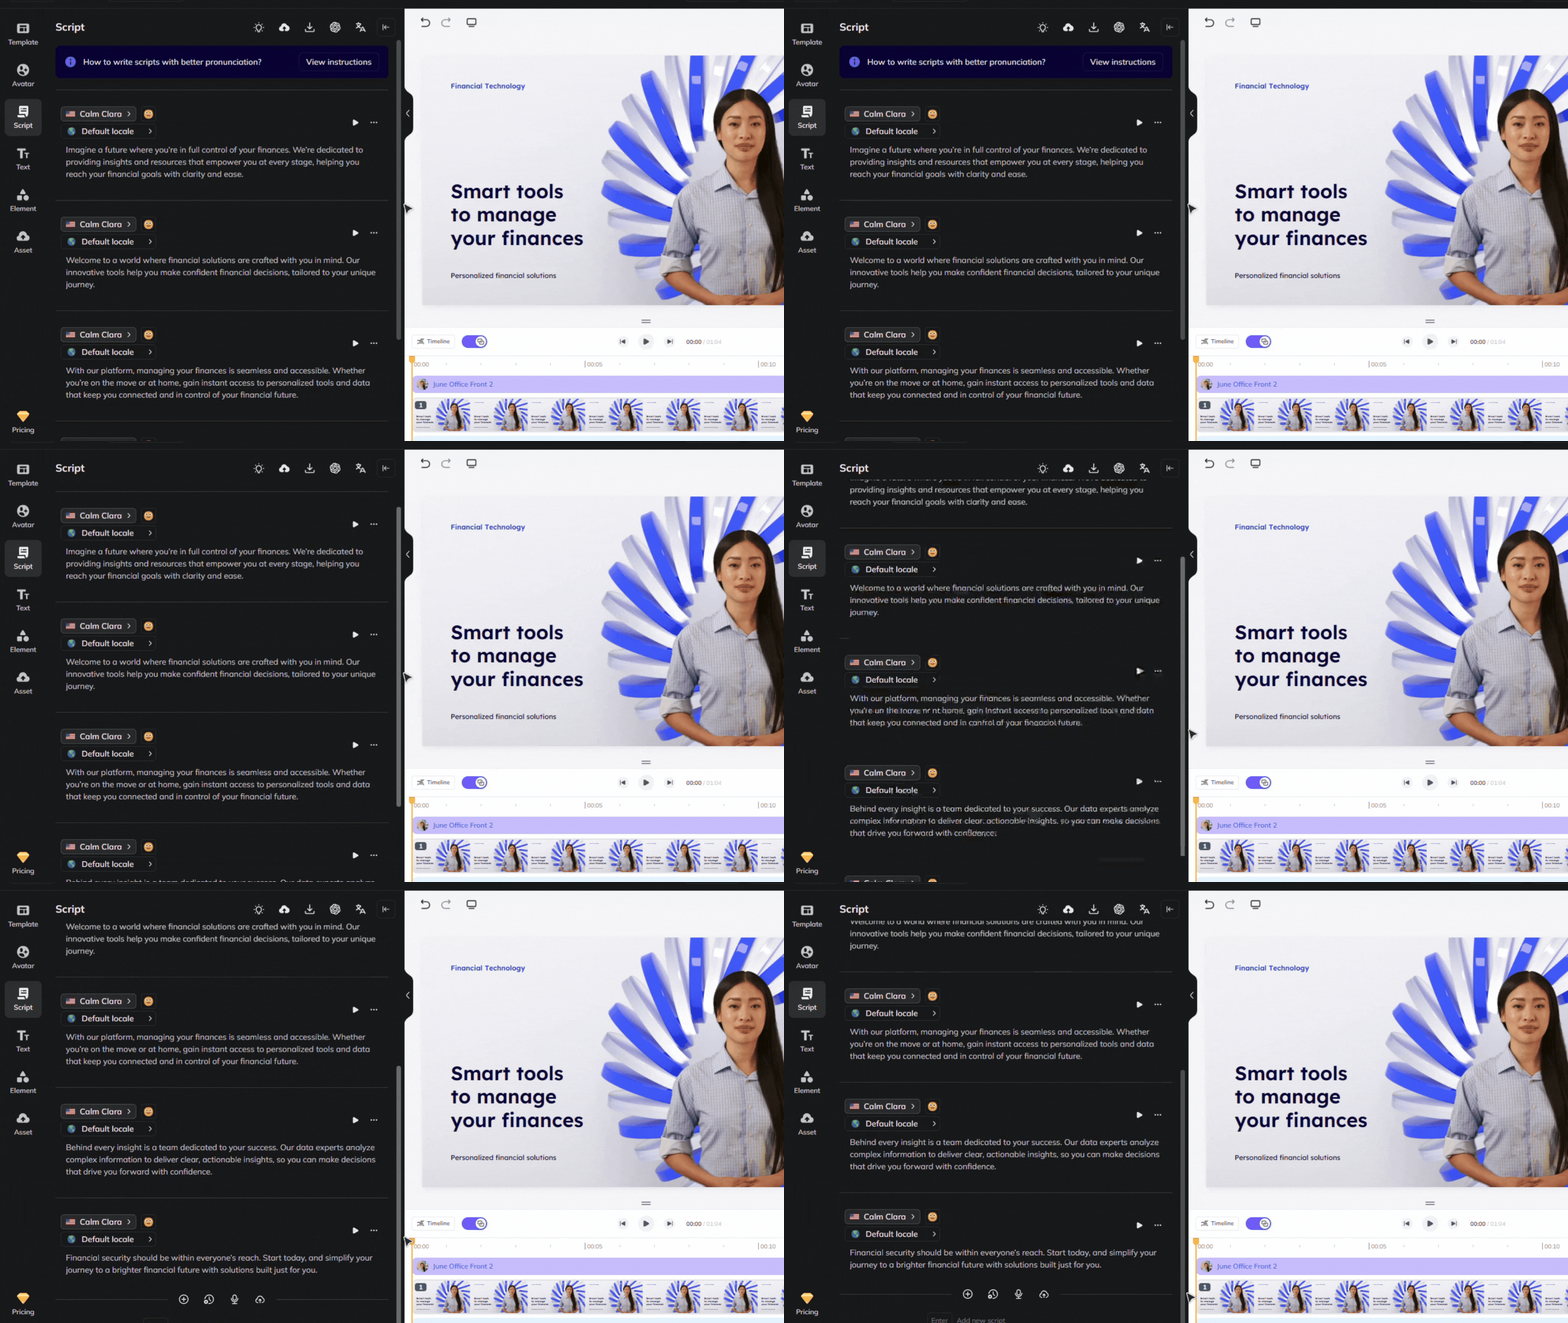
Polish your video to perfection with HeyGen’s intuitive editing tools. HeyGen uses a text-based editor to ensure your scenes, text and transitions align perfectly with your script.

Review your flow and ensure the avatar’s gestures, voice and timing align with your script. Don’t miss our scripting tips which can help ensure accurate pronunciation and pauses for a natural flow. Make adjustments for clarity, pacing, or tone.
Step 5: Export and share
Once you’re satisfied with your video, click the Generate button and download or share your video!
Pro Tip: Include captions for accessibility and to boost engagement on silent autoplay platforms.
Step 6: Add seamless localization
Want to scale the impact of your videos even more? Consider expanding your reach by localizing your content to 170+ languages and dialects with ease.
Creating professional, engaging videos has never been easier, thanks to HeyGen's AI-powered tools. With lifelike avatars, seamless localization, and intuitive features, you can captivate learners and make a global impact—one video at a time!
Bonus tips for successful learning courses
Looking to make your learning courses even more effective? Try these strategies to maximize engagement:
- Leverage screen recordings: Showcase tutorials or walkthroughs to guide learners through complex processes.
- Add captions for accessibility: Enhance understanding by providing captions in multiple languages for global reach.
- Use interactive quizzes: Reinforce learning by including quizzes or reflection points throughout your course.
- Optimize for mobile: Ensure your content is clear, concise, and easily viewable on mobile devices.
With HeyGen, you can create engaging, high-quality learning experiences that captivate learners everywhere. Start enhancing your courses today!
Like
Comments (0)
Popular

